Picture this: I’m in the middle of a Sunday brunch, a pot of coffee steaming, a playlist humming, and my kitchen smells like melted chocolate and vanilla. Suddenly, the timer rings, I rush to the oven, only to find the brownies collapsed into a glossy, gooey mess that could have doubled as a dessert cake. The disappointment was instant, and my taste buds were left craving something that could turn that disaster into a triumph. I swear, the moment the chocolate hit the pan, my heart did a little victory dance—if only the texture matched the aroma.
I stared at that flat, brown slab and thought, “There’s a way to make this work.” I grabbed a spatula, turned up the heat, and let the chocolate melt into a silky river. The sound of the butter melting was like a gentle sigh, the scent of cacao hit my nose like a velvet blanket, and the sweet, bitter swirl of sugar began to dance across the surface. I could almost taste the future—rich, fudgy, with a hint of cherry that would pop like a secret in every bite.
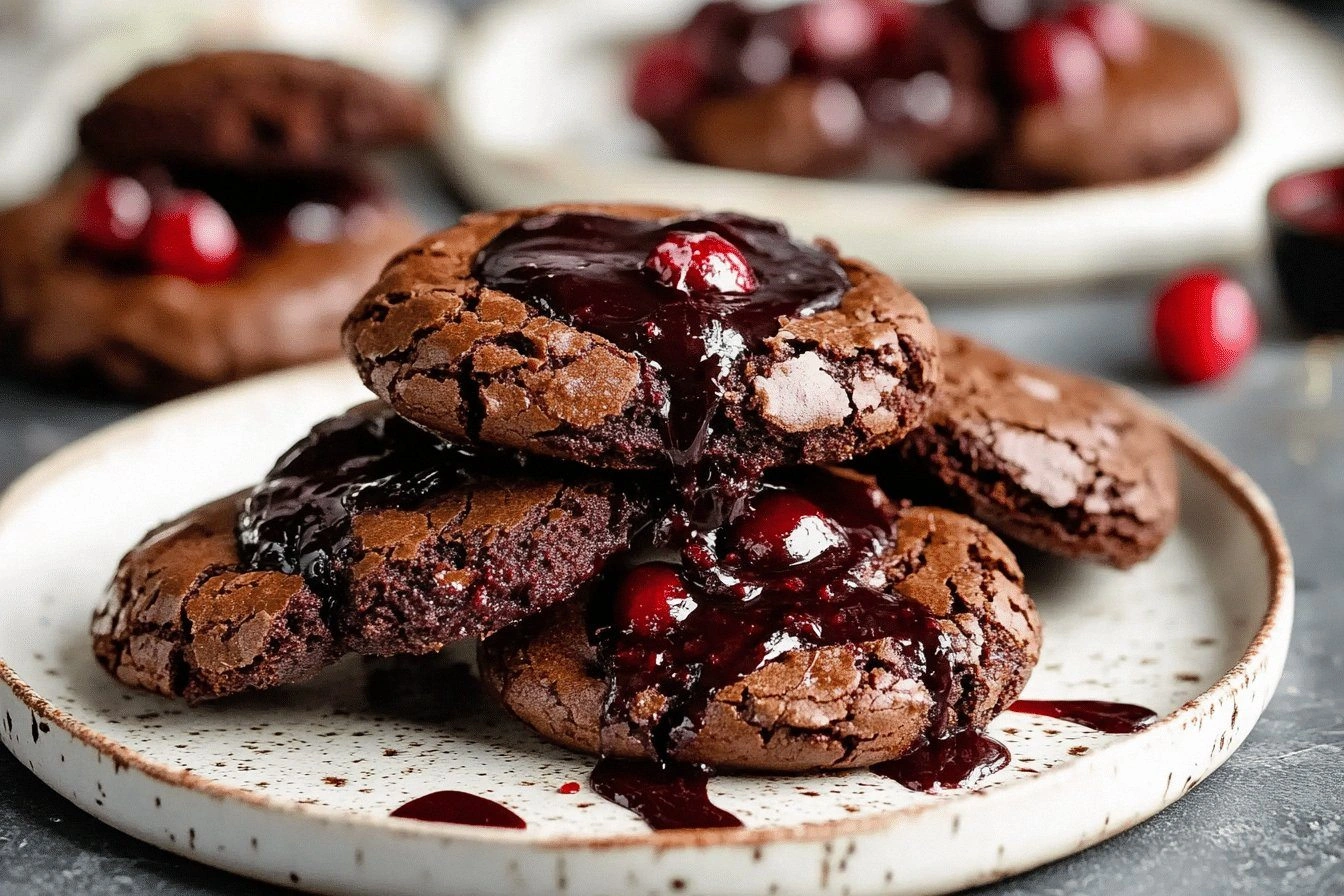
That moment was the spark that ignited my obsession with the Black Forest Flourless Brownie. I spent nights experimenting, tweaking ratios, and even adding a splash of cherry liqueur to the batter. The result? A brownie that’s dense, fudgy, and packs a cherry punch that feels like a midnight kiss. Most people reach for the classic flour-based brownie, but this version bypasses the flour entirely, letting the chocolate and cherries shine without dilution.
What sets this recipe apart is the delicate balance between the deep chocolate base and the bright, tart cherries. I’ve discovered that using a high‑cocoa dark chocolate gives the brownie that silky mouthfeel, while the dried cherries provide bursts of sweet‑tart flavor that cut through the richness. And the trick? I fold in the cherries at the very end, just before baking, so they stay plump and juicy instead of turning to mush.
Now, I’m going to walk you through every single step. By the end, you’ll wonder how you ever made it any other way. I dare you to taste this and not go back for seconds. Let the adventure begin.
What Makes This Version Stand Out
- Depth of Flavor: The chocolate is the soul of the recipe, providing a robust, bittersweet foundation that makes every bite a revelation. The cherries add a contrasting burst that keeps the palate engaged.
- Texture: The absence of flour gives the brownies a dense, fudgy crumb that melts in your mouth like a decadent piece of velvet.
- Ease of Preparation: With just seven ingredients and a single pan, you can whip up a batch in under 45 minutes—perfect for a spontaneous dessert.
- Versatility: The recipe is a canvas; swap in white chocolate, add a splash of espresso, or sprinkle sea salt on top for endless variations.
- Make‑Ahead Potential: Once baked, these brownies keep fresh in the fridge for a week and freeze beautifully for future indulgences.
- Presentation: Serve them warm with a dusting of powdered sugar or a drizzle of cherry sauce for an Instagram‑ready look.
- Healthier Option: By cutting out flour, you reduce carbs without sacrificing flavor, making this a guilt‑free treat.
Inside the Ingredient List
The Flavor Base
Dark chocolate or cocoa powder is the heart of this brownie. A high‑cocoa dark chocolate (70% or higher) ensures that the bitterness balances the sweetness. If you prefer a slightly sweeter profile, you can substitute a portion of the chocolate with a dark chocolate with 60% cacao. Skipping the chocolate would leave the brownie flavorless, so it’s essential to use a quality product.
The Texture Crew
Eggs act as the main binder, giving the brownies structure while keeping them moist. The butter or coconut oil adds silkiness and a buttery finish that melts in your mouth. If you’re vegan, coconut oil works wonderfully and imparts a subtle tropical hint. Omitting the fat results in a crumbly, dry texture that can’t hold the chocolate’s richness.
The Unexpected Star
Dried cherries bring the signature Black Forest flair. They add bursts of tartness that cut through the chocolate’s depth. To avoid a mushy consistency, choose high‑quality dried cherries that are firm yet sweet. If you can’t find cherries, dried cranberries or raisins are acceptable substitutes, but they’ll alter the flavor profile.
The Final Flourish
Sugar balances the bitterness of the cacao and sweetens the cherries. A pinch of salt draws out all the flavors and intensifies the chocolate notes. Vanilla extract deepens the aroma and adds an aromatic warmth that’s hard to miss. If you’re watching sugar intake, you can reduce the sugar by a quarter and add a splash of espresso to preserve the chocolate bite.
Everything's prepped? Good. Let’s get into the real action.
The Method — Step by Step
- Preheat your oven to 350°F (175°C) and line a 9-inch square baking pan with parchment paper. The parchment ensures easy release and a clean finish. If you’re using a metal pan, grease it lightly with butter or oil. The goal is to prevent sticking without adding extra fat.
- Melt the butter or coconut oil in a medium saucepan over low heat. Add the dark chocolate pieces, stirring constantly until fully melted and smooth. The chocolate should feel silky and glossy, not gritty. This step is crucial for a uniform batter; any lumps will disrupt the texture.
- Remove the pan from the heat and whisk in the sugar until the mixture is glossy and the sugar dissolves. The batter should look like a thick, glossy syrup. If the sugar is still gritty, give it another minute and stir again. This ensures a smooth mouthfeel in the final product.
- Beat in the eggs one at a time, ensuring each is fully incorporated before adding the next. The batter will thicken slightly after each egg. This step builds the structure that holds the brownies together. The more you whisk, the smoother the crumb will be.
- Add the vanilla extract and pinch of salt, whisking until the mixture is a uniform, glossy batter. The salt is a subtle enhancer; it doesn’t taste salty, it just brings out the chocolate’s richness. If you’re vegan, use a plant‑based vanilla extract to keep the flavor profile consistent.
- Fold in the dried cherries gently, using a spatula to keep them evenly distributed. Avoid overmixing, as that can break the cherries apart. The cherries should be visible throughout the batter, giving the brownie a speckled look. They add that signature Black Forest bite.
- Pour the batter into the prepared pan, smoothing the top with a spatula. The batter should settle into a uniform layer. The edges should be slightly higher than the center for a classic look. This step ensures even baking.
- Bake for 25–30 minutes, or until the top has set and a toothpick inserted into the center comes out with a few moist crumbs. The smell will be a deep, chocolatey aroma that fills the kitchen. This is the moment of truth—watch the edges rise and the batter set.
- Cut into squares while still warm for a gooey, molten center, or let them cool completely for a firm, slice‑ready texture. The choice depends on your mood—warm brownies feel like a hug, while cool ones are perfect for a dessert platter. Serve immediately or store as described below.
That’s it — you did it. But hold on, I’ve got a few more tricks that’ll take this to another level.
Insider Tricks for Flawless Results
The Temperature Rule Nobody Follows
Bake at a steady 350°F (175°C). Many bakers lower the temperature to 325°F to prevent the brownies from browning too quickly. While that can work, it often leads to a denser crumb and a less glossy top. Stick to 350°F for a balanced bake.
Why Your Nose Knows Best
The aroma of chocolate melting is the first indicator of success. When you smell the chocolate, you know the batter is at the right consistency. If the smell is too sweet or too bitter, adjust the sugar or chocolate accordingly. Trust your nose; it’s a reliable guide.
The 5‑Minute Rest That Changes Everything
After baking, let the brownies rest in the pan for 10 minutes before cutting. This brief rest allows the structure to set, making slicing easier and reducing crumb. It also lets the flavors meld together. I’ve seen this trick turn a decent batch into an unforgettable one.
The Secret of Even Slices
Use a sharp knife and a steady hand. If you slice too quickly, the brownies can crumble. A warm knife, warmed in the microwave for a few seconds, helps produce clean cuts. I’ve had better results with a serrated knife for a more rustic look.
The Cherry Power Boost
For an extra cherry kick, drizzle a thin layer of cherry jam over the top before serving. The jam adds a glossy finish and a sweet‑tart contrast. This is a favorite at parties where you want the brownies to stand out.
The Final Flourish
Dust the top with powdered sugar or cocoa powder just before serving. It adds a visual pop and a subtle flavor that complements the chocolate. If you’re feeling fancy, top with a dollop of whipped cream and a few fresh cherries for a decadent finish.
Creative Twists and Variations
This recipe is a playground. Here are some of my favorite ways to switch things up:
Espresso Explosion
Add a teaspoon of instant espresso powder to the batter for a coffee‑infused chocolate experience. The espresso deepens the cacao notes and adds a subtle bitterness that balances the sweetness.
Almond Crunch
Stir in 1/2 cup of chopped toasted almonds for a nutty crunch. The almonds pair beautifully with the cherries and add a satisfying texture.
White Chocolate Whisper
Replace half the dark chocolate with white chocolate for a sweeter, creamier flavor. The contrast between dark and white chocolate creates a delightful visual and taste profile.
Minty Fresh
Add a teaspoon of peppermint extract for a cool, minty twist. The mint pairs wonderfully with the chocolate and cherries, giving the brownies a refreshing finish.
Nutella Drizzle
Drizzle warm Nutella over the brownies before serving. The hazelnut spread adds a rich, nutty flavor that complements the chocolate base.
Coconut Cream Finish
Top the brownies with a swirl of coconut cream and a sprinkle of toasted coconut flakes. This tropical twist adds a light, airy texture and a hint of coconut aroma.
Spiced Surprise
Add a pinch of cayenne pepper or a dash of cinnamon to the batter. The spice adds warmth and complexity, creating a layered flavor experience.
Raspberry Rapture
Swap the dried cherries for dried raspberries. The raspberries bring a tart, fruity note that complements the chocolate in a new way.
Storing and Bringing It Back to Life
Fridge Storage
Store brownies in an airtight container at room temperature for up to 4 days. If you prefer them chilled, keep them in the fridge; they’ll stay moist and fresh. Avoid exposing them to direct sunlight, which can cause the chocolate to bloom.
Freezer Friendly
Wrap each brownie individually in plastic wrap, then place them in a freezer bag. They can be frozen for up to 3 months. When ready, let them thaw at room temperature for 15 minutes before serving.
Best Reheating Method
To revive frozen brownies, microwave on low for 10–15 seconds or reheat in a preheated oven at 300°F (150°C) for 8 minutes. Add a tiny splash of water before reheating; it steams the brownies back to a moist, fudgy texture.