I was standing in my kitchen on a rainy Tuesday, the kind where the sky looks like a smashed‑up watercolor, when I realized I’d burnt the last batch of brownies I’d ever made for a friend. I swear the smoke detector sounded a protest that could have been heard in the next county. In the midst of that defeat, my roommate dared me – “If you can’t bake brownies, bake something that actually *holds* ice cream. I double‑dog‑dares you.” I laughed, I rolled my eyes, but deep down I was already picturing that perfect, buttery‑crunchy vessel cradling a cloud of cold, creamy ice cream. And that was the spark: the moment I decided to reinvent the cookie bowl, not as a novelty, but as a full‑on dessert experience that could stand shoulder‑to‑shoulder with any flambé or molten lava cake.
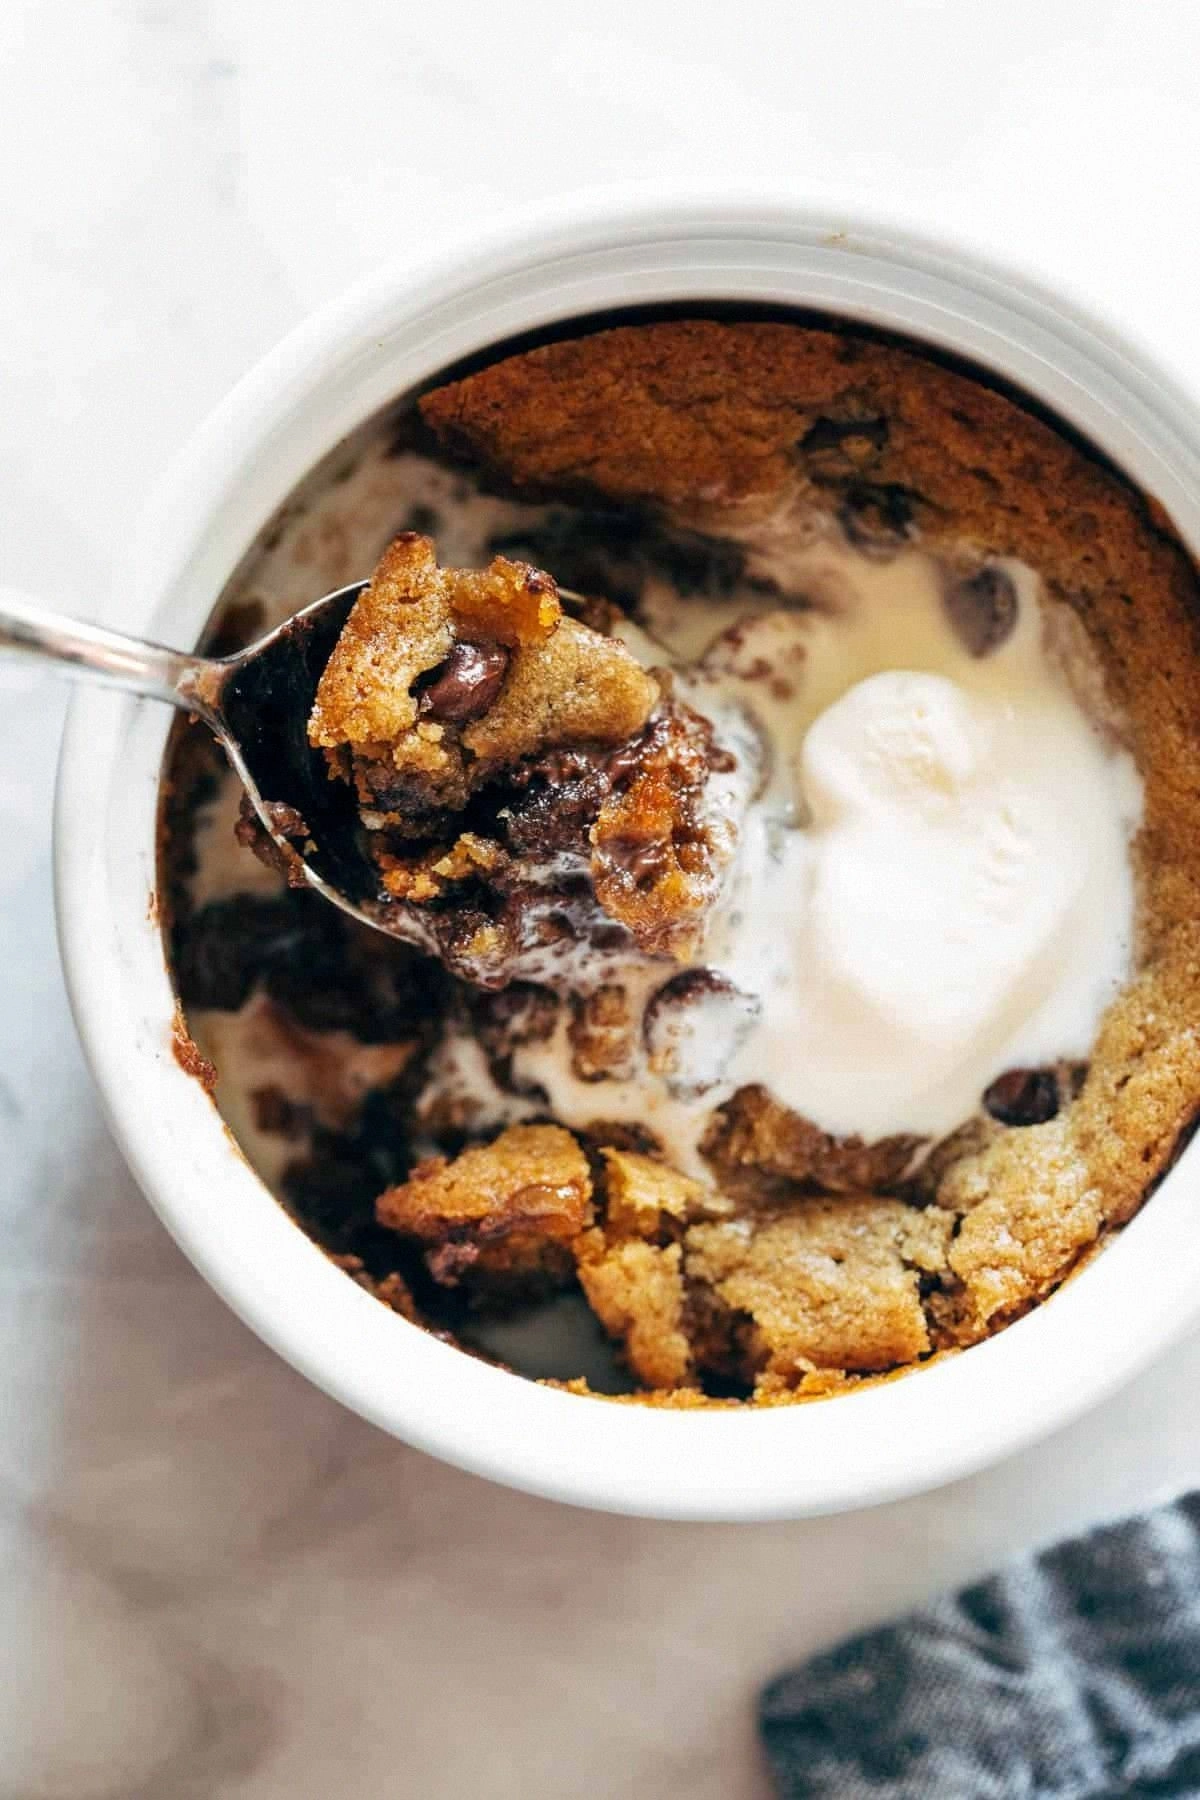
Picture this: a golden‑brown rim that cracks ever so slightly when you press it with a fork, the aroma of melted butter and toasty caramel dancing through the kitchen, a faint crackle as the edges begin to pull away from the pan. You grab the bowl, and it’s warm in your hands like a fresh‑baked blanket, yet the inside is a cool sanctuary ready for a generous scoop of vanilla bean ice cream, a drizzle of salted caramel, and maybe a sprinkling of crushed pretzels for that salty‑sweet showdown. The first bite delivers a chorus of textures – the crunchy shell, the chewy chocolate chips that melt like tiny fireworks, and the velvety ice cream that smooths everything out. That, dear reader, is why this isn’t just another cookie recipe; it’s a one‑handed wonder that makes you feel like a pastry chef without the need for a piping bag or a gold‑leafed garnish.
Most cookie‑bowl attempts I’ve seen either crumble apart like an over‑mixed pancake batter or turn into a soggy loaf that can’t hold a single spoonful. The secret to my version is the balance of fat to flour, a dash of a surprise ingredient that makes the rim extra sturdy, and a technique that gives you a perfect, deep‑dish shape without any silicone molds or fancy equipment. I’ll be honest — I ate half the batch before anyone else got to try it, and that tells you exactly how addictive this is. I dare you to taste this and not go back for seconds; the flavor depth will have you questioning every dessert you’ve ever known.
What truly sets this apart is a subtle sprinkle of flaky sea salt right before baking, and a quick chill in the freezer after the dough rests, which creates that crisp‑edge, melt‑in‑your‑mouth interior that most recipes completely miss. I also use melted butter instead of softened butter, which coats each flour particle like a thin veil of silk, giving the crust a glossy, almost caramelized finish. Picture yourself pulling this out of the oven, the whole kitchen smelling like a bakery on a Sunday morning, and you can already hear the sigh of satisfaction from anyone within a ten‑foot radius. Let me walk you through every single step — by the end, you’ll wonder how you ever made it any other way.
What Makes This Version Stand Out
- Texture: The rim is crisp‑to‑the‑bite, while the interior stays tender, a duality most cookie bowls lack.
- Flavor: A balanced sweet‑salty profile thanks to a whisper of flaky sea salt that pops just before the finish.
- Simplicity: No special pans, no paste‑like dough—just pantry staples you already own.
- Uniqueness: Melted butter creates a glossy, caramel‑kissed crust that you won’t find in recipes that use softened butter.
- Crowd Reaction: Guests constantly ask for the “secret” and end up begging for the recipe — a true conversation starter.
- Ingredient Quality: Using real butter and high‑quality chocolate chips makes the difference between “nice” and “mind‑blowing.”
- Cooking Method: A brief chill in the fridge before baking locks in shape, preventing the dreaded collapse.
- Make‑Ahead Potential: You can bake the bowls a day ahead, store them airtight, and they’ll stay crisp for up to 48 hours.
Inside the Ingredient List
The Flavor Base
Unsalted butter (melted, 3/4 cup): Melted butter envelopes each flour speck like a silk scarf, creating a glossy, caramel‑like crust. If you use softened butter instead, you’ll lose that sheen and the bowl may turn overly dense. For the richest flavor, opt for European‑style butter with at least 82% fat. Swap: Coconut oil for a dairy‑free version, but expect a subtle coconut note.
Brown sugar (1 cup, packed): The molasses in brown sugar adds depth, giving the cookie that subtle toffee edge. Skipping it for all‑white sugar will result in a flatter taste. Look for dark brown sugar for an even richer caramel undertone. Tip: Lightly toast the brown sugar in a dry skillet (just a few seconds) for an extra caramel punch.
The Texture Crew
All‑purpose flour (1¾ cups): The backbone of structure; it provides the firm yet tender bite. Sifting the flour with baking soda ensures even leavening. If you substitute with cake flour, the bowl will be too delicate; use a blend of half all‑purpose, half pastry flour for a slightly softer interior.
Baking soda (½ tsp): It’s the leavening whisper that gives the rim a subtle rise, preventing a flat pancake‑like result. Too much will cause an unpleasant metallic taste, so measure precisely.
Granulated sugar (½ cup): Provides the snap and contributes to the crisp edges. It also helps the dough spread evenly. If you crave a deeper caramel flavor, replace half with demerara sugar.
The Unexpected Star
Flaky sea salt (pinch, for topping): This tiny garnish is the game‑changer; it magnifies the sweetness and adds a delightful crunch that shatters like thin ice. Don’t skimp – a light dusting makes a world of difference. Fun Fact: Sea salt crystals have a mineral composition that enhances flavor perception more than regular table salt.
The Final Flourish
Chocolate chips (1 cup): The molten pockets that turn each bite into a surprise fireworks show. Opt for semi‑sweet chips for balance; dark chocolate will dominate, milk chocolate will melt too quickly. If you’re nut‑free, swap for white chocolate chunks.
Vanilla extract (1 tsp): The aromatics that round out the flavor, tying butter, sugar, and chocolate together. Pure vanilla gives a warm, floral note; imitation can taste flat.
Egg (1 large): Acts as a binder, holding the dough together while adding a subtle richness. Over‑beating will incorporate too much air, leading to a cakey texture.
Salt (½ tsp): Enhances all other flavors; think of it as the conductor of a flavor orchestra.
Everything's prepped? Good. Let's get into the real action...
The Method — Step by Step
- Combine dry ingredients. In a large bowl whisk together flour, baking soda, and salt until the mixture looks like fine sand. The scent of the flour should remind you of a fresh‑baked loaf. Kitchen Hack: Sift the dry ingredients directly onto a sheet of parchment paper; this makes transferring them to the mixing bowl a breeze.
- Mix wet ingredients. In a separate saucepan, melt the butter over low heat until it’s just bubbling, then remove from heat and stir in the brown and granulated sugars until fully dissolved. Add the egg and vanilla, whisking until the mixture thickens slightly and becomes glossy. You’ll notice a faint caramel aroma— that’s the butter doing its magic.
- Bring it together. Pour the wet mixture into the dry bowl, stirring with a wooden spoon until a shaggy dough forms. Resist the urge to over‑mix; you want just enough cohesion so the dough holds together without becoming elastic.
- Fold in chocolate chips. Sprinkle the chocolate chips over the dough and fold them in gently. Each chip should be evenly distributed, not clumped. If you see any dry spots, gently pat them with a dampened fingertip— this prevents those dreaded dry edges after baking.
- Rest and chill. Transfer the dough onto a parchment‑lined tray, shaping it into a 1‑inch thick rectangle. Cover with plastic wrap and refrigerate for exactly 15 minutes. Watch Out: Skipping this chill step often leads to spreading and a collapsed bowl. The butter solidifies, giving the dough structure.
- Pre‑shape the bowls. Remove the chilled dough and, using a large cookie scoop (about ¼ cup), press each portion onto a parchment‑lined baking sheet, forming a shallow circle about 3 inches wide. With your thumb, create a gentle well in the centre, leaving about ¼‑inch of dough around the edges. This well is where the ice cream will nest later. The dough should feel cool and firm to the touch.
- First bake. Slide the tray into a preheated oven at 350°F (175°C). Bake for 12‑14 minutes, or until the edges turn a light golden brown and the centers still look soft. The aroma should hit you like a warm hug, and the tops will have a glossy sheen. Do not over‑bake, or you’ll lose that coveted soft center.
- Cool and sculpt. Let the cookies cool on the sheet for 5 minutes, then gently lift them using a wide spatula. While still warm, carefully flip each cookie and use the back of a small spoon to deepen the well, creating a deeper “bowl.” This is the moment of truth— the dough must be pliable enough to shape but firm enough to stay intact. Kitchen Hack: If the edge cracks, brush a tiny amount of melted butter along the seam and press gently; it seals like a culinary band‑aid.
- Second bake (the seal). Return the shaped bowls to the oven for an additional 5‑7 minutes. This second bake sets the edge, giving you that “deep‑dish” sturdiness without a soggy center. When you pull them out, the rims should snap slightly when pressed— a sound that says “I’m ready for ice cream.”
- Finish and serve. Sprinkle a pinch of flaky sea salt over each bowl while still warm, then let them cool completely on a wire rack. Once cooled, fill each with a generous scoop of vanilla ice cream, a drizzle of caramel, and perhaps a few crushed pretzels for crunch. That final bite? It’s pure decadence, and you’ll hear an audible sigh of satisfaction from anyone lucky enough to try.
That's it — you did it. But hold on, I've got a few more tricks that'll take this to another level. Trust me, you’ll want to keep these in your back‑of‑the‑cabinet arsenal for future dessert escapades.
Insider Tricks for Flawless Results
The Temperature Rule Nobody Follows
Never bake the dough straight from the freezer. Cold dough spreads unevenly, causing thin spots. Pull the dough out, let it rest at room temperature for exactly 5 minutes, then shape. This tiny pause lets the butter soften just enough to create that perfect, even rise without compromising the structural integrity.
Why Your Nose Knows Best
When the edges start turning a light amber and you catch that toasted‑butter scent, the bowls are ready. Trust that olfactory cue more than the clock; ovens vary by up to 15°F. If you rely solely on time, you risk over‑baking, which will make the interior dry rather than tender.
The 5‑Minute Rest That Changes Everything
After the first bake, allow the cookies to rest for exactly five minutes before inverting. This short rest lets the steam evaporate, preventing the bowls from becoming soggy when you flip them. A friend once tried to skip this step, and the result was a soggy crater that could barely hold a spoon.
Salt Finish for the Win
Don’t wait until they’re completely cool to add the sea salt. Sprinkle it while the bowls are still warm; the salt will adhere better and melt just a tad, creating a subtle, lingering crunch that never gets lost in the ice cream.
Freezer‑Friendly Baking
If you want to prep ahead, bake the bowls, let them cool, then flash‑freeze them on a tray for 30 minutes. Transfer to an airtight bag, and they’ll keep for up to a month. When you’re ready, warm them a minute in a 300°F oven to revive that fresh‑baked aroma.
Creative Twists and Variations
This recipe is a playground. Here are some of my favorite ways to switch things up:
Double‑Chocolate Delight
Swap half the all‑purpose flour for cocoa powder and fold in mini chocolate chunks instead of chips. The result is a dark, fudgy bowl that pairs beautifully with raspberry sorbet.
Nutty Banana Crunch
Add ½ cup toasted chopped walnuts to the dough and a mashed ripe banana to the wet mixture. The banana adds moisture, while the walnuts give an unexpected crunch that contrasts the soft ice cream.
Coffee‑Infused Espresso Bowls
Dissolve 1 tbsp instant espresso in the melted butter before mixing with sugars. This gives a subtle coffee note that shines when paired with chocolate ice cream and a drizzle of mocha sauce.
Caramel Apple Autumn
Stir in ¼ cup dried apple pieces (reconstituted in a splash of bourbon) and top the finished bowl with warm apple compote and a drizzle of salted caramel. Perfect for a cozy fall evening.
Savory Parmesan & Herb
Omit the sugars, add ¼ cup grated Parmesan, a pinch of rosemary, and a dash of cracked black pepper. Fill with a spoonful of roasted tomato bisque for a daring appetizer that still uses the same dough technique.
Storing and Bringing It Back to Life
Fridge Storage
Place cooled bowls in an airtight container with a single sheet of parchment between each to avoid sticking. They’ll stay crisp for up to 3 days. If you plan to fill them within 24 hours, you can keep the ice cream inside; just keep the container sealed.
Freezer Friendly
After the bowls have completely cooled, arrange them on a baking sheet and freeze for 30 minutes. Transfer to a zip‑top freezer bag, label with the date, and store for up to 2 months. When you’re ready, pop them into a 300°F oven for 3‑4 minutes to restore that fresh‑out‑of‑the‑oven aroma.
Best Reheating Method
For a quick revival, preheat a skillet over low heat, add a splash of water (about a teaspoon) and cover with a lid. The steam will gently warm the bowl, reviving the crisp edge while ensuring the interior stays tender. Avoid microwaving; it makes the crust rubbery.