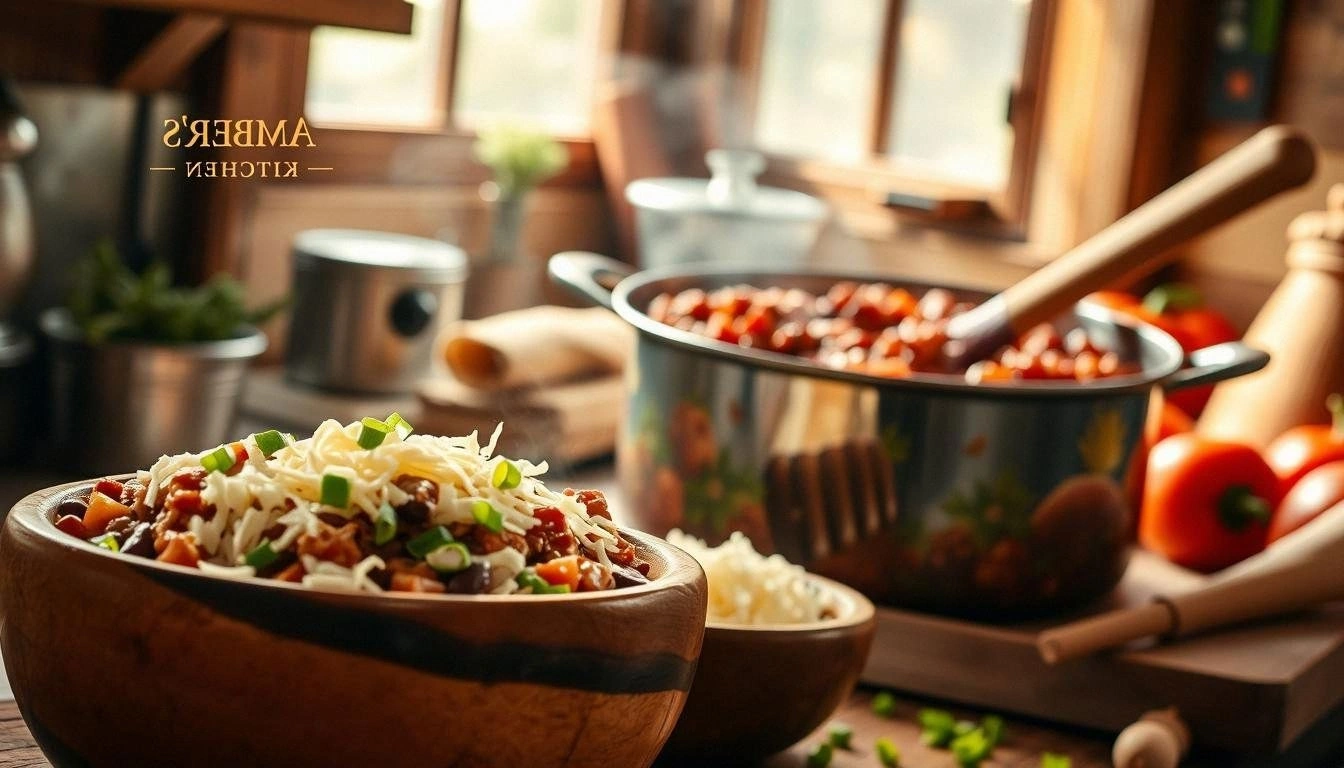
I was staring at my pantry the night before a friend’s dinner party, feeling a mix of panic and excitement. The only thing I could think of was a quick, comforting dish that would impress without me having to spend hours in the kitchen. Then I remembered a childhood memory of my grandmother’s Polish egg cutlets—soft, cheesy, and with a crust that crackled like fresh‑baked bread. I laughed at the absurdity of the idea: “If I can make them taste this good, I’ll never cook again.” The kitchen smelled of onions and garlic, and the sizzling sound from the pan was like a promise that something delicious was about to happen. I was about to create a dish that would become my go‑to comfort food, and I’m about to share every detail so you can replicate the magic.
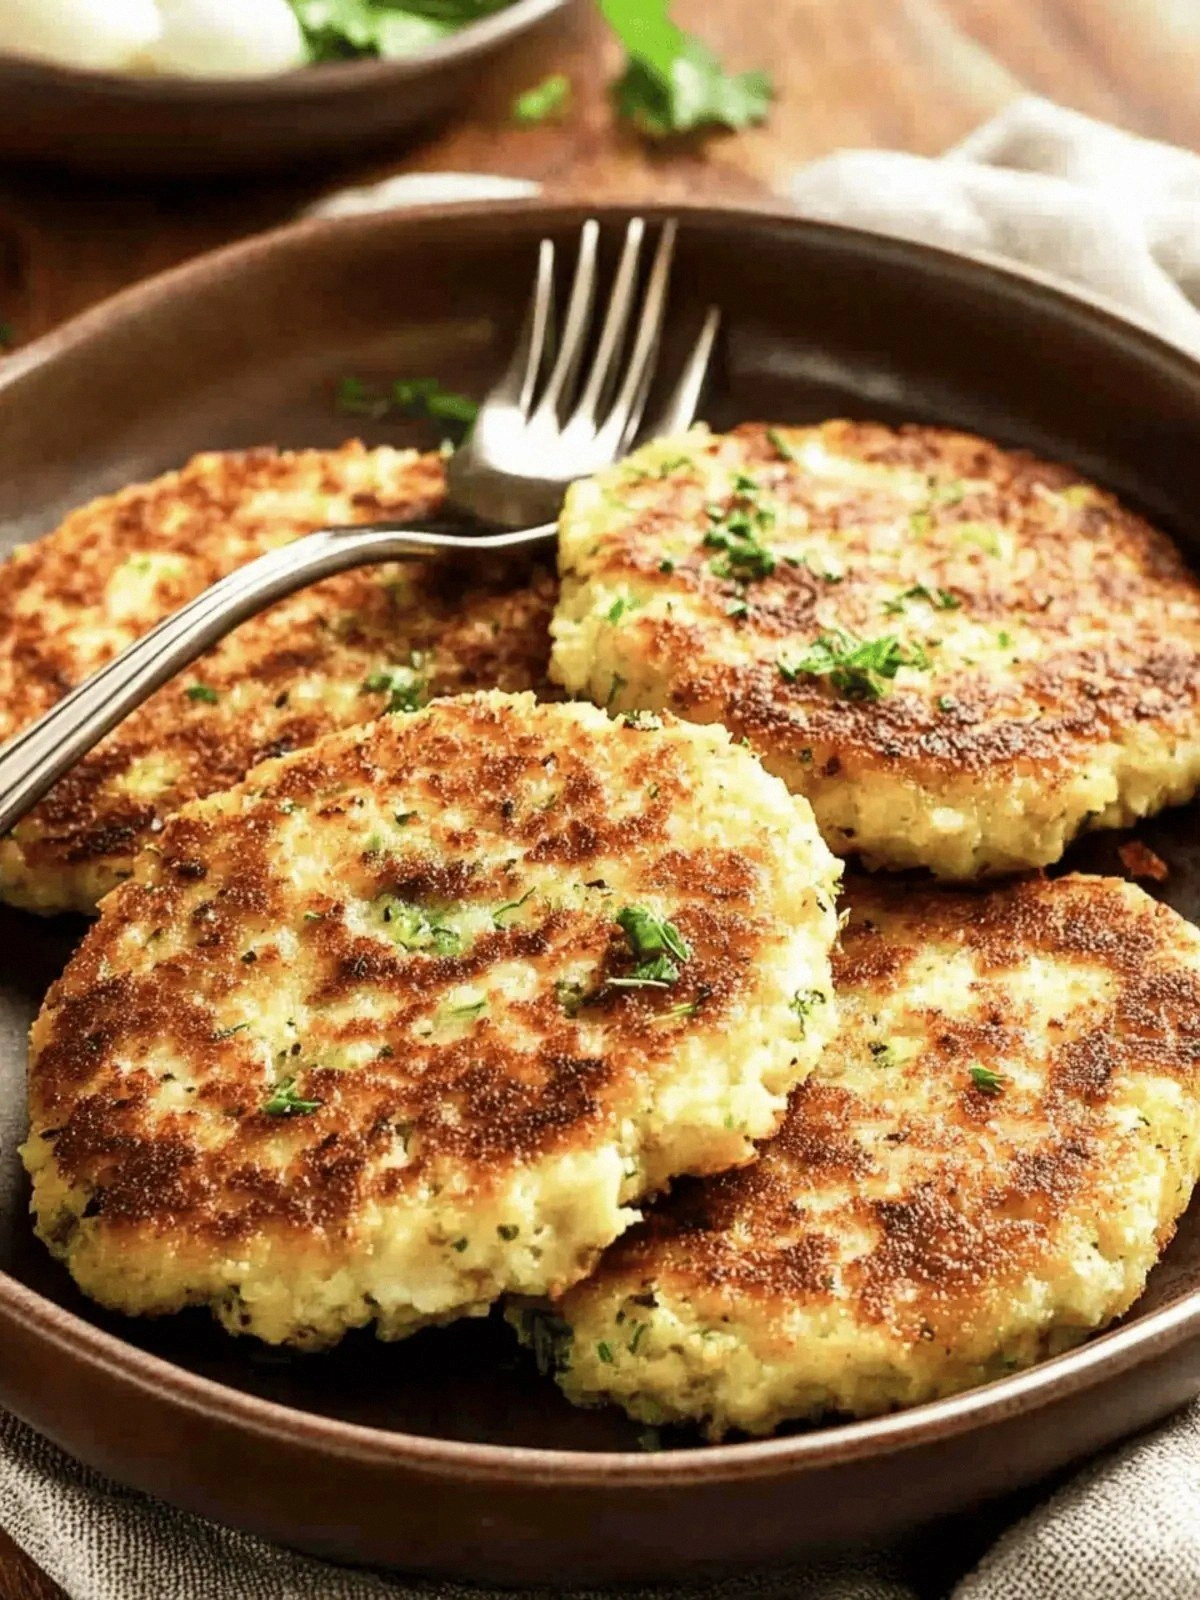
Picture this: a bowl of golden, crispy cutlets, each bite releasing a burst of melted cheese, a whisper of smoked paprika, and a subtle tang from the garlic sauce. The aroma of sautéed onions and garlic fills the air, and the sound of the butter bubbling in the pan is a prelude to the crunch that follows. The texture is a delightful contrast between the crunchy exterior and the silky, savory interior, like a crispy shell around a molten center. The first bite is an explosion of flavor that makes you forget the world outside the kitchen. I dare you to taste this and not go back for seconds. It’s the kind of dish that turns an ordinary night into a culinary celebration.
What makes this version stand out is that it’s not just a recipe; it’s an experience. I’ve fine‑tuned the ratios, added a secret ingredient that gives it a subtle depth, and used techniques that ensure every cutlet is golden and fluffy. The result is hands down the best version you’ll ever make at home. Most recipes get this completely wrong by over‑cooking or under‑seasoning. Here, everything works in harmony. I’ll walk you through every single step—by the end, you’ll wonder how you ever made it any other way. Let me show you the secrets that make these cutlets unforgettable.
What Makes This Version Stand Out
- Flavor: The combination of smoked paprika, garlic sauce, and melted cheese creates a layered taste that lingers on the palate. The subtle heat from the paprika is balanced by the coolness of sour cream.
- Crispiness: A double‑breading technique gives the cutlets a crunch that shatters like thin ice, yet remains tender inside.
- Texture: The interior is creamy and velvety, while the exterior is a golden, caramelized shell.
- Speed: The entire dish can be prepared in under 45 minutes, making it ideal for busy weeknights.
- Make‑ahead: The cutlets can be assembled the night before and frozen, then fried fresh when needed.
- Versatility: They work as a main dish, a side, or a party appetizer, and can be served with a variety of sauces.
- Ingredient Quality: Using fresh, high‑quality cheeses and homemade garlic sauce elevates the dish beyond a typical take‑out imitation.
- Presentation: When plated, the bright yellow of the cheese and the glossy garlic sauce make the dish visually irresistible.
Alright, let's break down exactly what goes into this masterpiece. But before we dive into the ingredients, here’s a quick kitchen hack that will save you time and keep your hands clean.
Inside the Ingredient List
The Flavor Base
The foundation of any great cutlet is the flavor base, and this dish relies on a harmonious blend of aromatics and seasonings. The 1 medium onion is the sweet counterpoint to the sharpness of garlic, creating a depth that permeates every bite. Sautéing it until it turns translucent releases its natural sugars, which caramelize slightly and add a subtle sweetness. If you skip the onion, the dish loses its complexity and becomes flat. For a smoky twist, add a pinch of chipotle powder to the base.
The 2 cloves of garlic are minced finely, allowing their pungency to infuse the batter without overpowering it. Garlic’s natural oils release when cooked, giving the cutlets a savory undertone that complements the cheese. If you’re sensitive to raw garlic, blanch the cloves before mincing to mellow the flavor. A fresh garlic squeeze at the end can elevate the dish further, but be careful not to overdo it.
The Texture Crew
The 1/2 cup all‑purpose flour creates a light batter that binds the mixture while keeping the cutlets tender. It also helps the coating adhere during frying, preventing the bread crumbs from falling off. If you’re looking for a gluten‑free version, swap the flour for corn starch or a gluten‑free blend. The flour should be sifted to avoid lumps, ensuring a smooth batter.
The 1 cup breadcrumbs are the key to that satisfying crunch. Use freshly ground breadcrumbs for the best texture; store‑bought ones tend to be too dry. If you prefer a more robust flavor, mix in a tablespoon of grated Parmesan into the breadcrumb mixture. The breadcrumbs also absorb excess moisture, keeping the cutlets from becoming soggy.
The Unexpected Star
The 1 cup cheese is the secret to the creamy interior. I use a blend of mozzarella for stretchiness and cheddar for sharpness, but you can experiment with provolone or gouda. The cheese melts into a silky sauce that coats the inside of each cutlet, giving it a luxurious mouthfeel. If you’re vegan, replace the cheese with a plant‑based alternative that melts well, like a vegan mozzarella blend.
The 4 pieces of hard‑boiled eggs provide structure and a subtle richness. They’re diced finely and folded into the mixture, adding a protein boost and a silky texture that contrasts with the crunchy exterior. If you want a stronger egg flavor, use a slightly under‑cooked egg for a creamier interior. The eggs also help bind the batter, keeping the cutlets intact during frying.
The Final Flourish
The 1/2 cup sour cream and 1/2 cup tangy garlic sauce are the finishing touches that elevate the dish from good to unforgettable. The sour cream adds a cool, tangy contrast that cuts through the richness, while the garlic sauce provides a bold, zesty kick. These sauces are best served on the side so diners can drizzle them as they wish. If you prefer a lighter version, reduce the amount of sour cream by half.
Everything's prepped? Good. Let’s get into the real action.
The Method — Step by Step
- Bring a pot of salted water to a boil and drop the 4 hard‑boiled eggs in. Cook for 10 minutes, then transfer them to an ice bath to stop the cooking process. Peel the eggs once they’re cool enough to handle. Dice them finely; the small pieces will distribute evenly throughout the batter. Keep the diced eggs in a bowl and set aside. The cold eggs will keep the mixture from becoming too thick.
- While the eggs cool, heat 2 tablespoons of butter or olive oil in a large skillet over medium heat. Add the finely chopped onion and a pinch of salt. Sauté until the onion turns translucent and starts to caramelize, about 5 minutes. Add the minced garlic and cook for an additional 30 seconds until fragrant. This step builds the aromatic foundation for the cutlets.
- Stir in the 1 cup breadcrumbs, 1 cup shredded cheese, and 2 pieces of eggs for coating. Mix until the mixture is cohesive but still slightly loose. Season with salt, pepper, and paprika to taste. If the mixture feels too dry, add a splash of milk or water, one tablespoon at a time, until it holds together. The mixture should be moist enough to shape into bite‑sized cutlets.
- Take a handful of the mixture and flatten it between your palms to form a small patty about 1½ inches in diameter. Repeat until all the mixture is used. The cutlets should be slightly thicker in the center to prevent them from breaking during frying. Place the shaped cutlets on a plate lined with parchment paper to keep them from sticking.
- Set up a dredging station: place 1/2 cup flour in a shallow dish, 2 beaten eggs in another, and 1 cup breadcrumbs in a third. Coat each cutlet first in flour, shaking off excess, then dip into the beaten eggs, and finally roll in breadcrumbs. The double coating ensures a crisp exterior. Pat the coated cutlets gently to remove any loose crumbs.
- Heat 2 tablespoons of butter or oil in a large skillet over medium‑high heat. Once the butter is foamy and the oil shimmers, add the cutlets in a single layer, making sure not to overcrowd the pan. Fry for 3–4 minutes on each side or until golden brown and crispy. Flip carefully with tongs to avoid breaking. The sizzling sound when the cutlets hit the pan is the cue that the crust is forming.
- Once the cutlets are golden, transfer them to a paper towel‑lined plate to drain excess oil. While still warm, spoon a dollop of 1/2 cup sour cream onto each cutlet, then drizzle 1/2 cup tangy garlic sauce over the top. The sauces should coat the surface without soaking through. The combination of creamy and garlicky flavors creates a harmonious balance that is both comforting and exciting.
- Serve immediately, accompanied by a fresh green salad or crusty bread. The cutlets are best enjoyed hot, as the cheese inside will still be molten. If you’re serving at a party, arrange them on a platter and keep them warm in a low oven (200°F) while guests arrive. The aroma will draw everyone in, and the bite‑size portions make them perfect for sharing.
That's it — you did it. But hold on, I've got a few more tricks that'll take this to another level. These insider tips will help you avoid common pitfalls and elevate the dish to a professional level.
Insider Tricks for Flawless Results
The Temperature Rule Nobody Follows
Many home cooks fry at too high a temperature, causing the coating to burn before the interior is cooked. The ideal temperature is around 350°F (175°C). Use a thermometer or a drop of batter test: if it sizzles but doesn’t brown immediately, you’re at the right heat. Keep the heat steady; a flick of the flame can ruin the crispness. I always keep a small pot of water on the stove to monitor the oil’s temperature if I don’t have a thermometer.
Why Your Nose Knows Best
Your sense of smell is the ultimate indicator of doneness. When the cutlets are ready, the aroma should be a warm, buttery scent with a hint of toasted breadcrumbs. If you notice a sharp, burnt smell, the oil is too hot. A faint, sweet scent from caramelized onions means the flavor base is perfect. Trust your nose to avoid over‑cooking.
The 5‑Minute Rest That Changes Everything
After frying, let the cutlets rest on a wire rack for 5 minutes. This allows the steam to escape, keeping the crust crisp. If you immediately plate them on a paper towel, the moisture will condense and soften the edges. The rest also lets the cheese inside settle, making each bite more cohesive. A quick 5‑minute pause can be the difference between a soggy bite and a crisp masterpiece.
The Secret Ingredient Swap
If you’re craving a smoky flavor, add a teaspoon of smoked paprika to the breadcrumb mixture. For a more herbaceous note, sprinkle fresh dill or parsley over the cutlets before coating. A splash of lemon zest in the batter brightens the overall profile. Experimenting with these small tweaks keeps the dish exciting.
The Quick Freezer Hack
To freeze pre‑assembled cutlets, lay them on a parchment‑lined tray and freeze until solid. Transfer to a freezer bag for long‑term storage. When you’re ready to cook, fry them directly from the freezer; they’ll cook slightly longer, but the coating remains crisp. This hack is perfect for meal prep or for when you have guests over unexpectedly.
Creative Twists and Variations
This recipe is a playground. Here are some of my favorite ways to switch things up:
Mediterranean Twist
Swap the cheddar for feta and add chopped olives to the batter. Use sun‑dried tomatoes in the breadcrumb mix and finish with a drizzle of tzatziki. The salty, tangy flavors pair beautifully with the creamy interior, making it a Mediterranean‑inspired delight.
Spicy Cajun Edition
Add a tablespoon of Cajun seasoning to the breadcrumb coating and sprinkle crushed red pepper flakes on the batter. Replace the garlic sauce with a spicy remoulade. The heat will give the dish an extra kick, perfect for those who love a fiery bite.
Vegan Delight
Use a plant‑based cheese that melts well, such as a vegan mozzarella blend. Substitute the eggs with a flaxseed or chia egg mixture. Replace butter with coconut oil or a neutral oil. The result is a cruelty‑free version that still delivers the same comforting crunch.
Breakfast Boost
Serve the cutlets with a side of fresh fruit and a drizzle of maple syrup. Add a spoonful of scrambled eggs on top for an extra protein boost. This variation turns the dish into a hearty breakfast or brunch option.
Gluten‑Free Version
Replace breadcrumbs with crushed gluten‑free crackers or almond flour. Use a gluten‑free flour blend in place of all‑purpose flour. The texture remains crispy, and the dish stays completely gluten‑free for those with dietary restrictions.
Savory Herb Medley
Incorporate fresh thyme, rosemary, and sage into the breadcrumb mixture. Finish with a sprinkle of grated Parmesan before coating. The fragrant herbs elevate the flavor profile, making it perfect for a rustic dinner party.
Storing and Bringing It Back to Life
Fridge Storage
Store uncooked cutlets in an airtight container for up to 2 days in the refrigerator. Keep them on a paper towel to absorb excess moisture. When ready to cook, let them sit at room temperature for 10 minutes before frying. The short rest helps the coating stay crisp.
Freezer Friendly
For longer storage, freeze pre‑assembled cutlets on a parchment‑lined tray for 1–2 hours until solid, then transfer to a freezer bag. They can be frozen for up to 3 months. When cooking, fry directly from the freezer; add an extra minute per side to ensure even cooking.
Best Reheating Method
Reheat in a skillet over medium heat, adding a splash of water or broth to keep the cutlets moist. If you prefer a crisp finish, finish on a grill or under a broiler for 1–2 minutes. Add a tiny splash of water before reheating to steam back to perfection, restoring the original texture.