I remember the night I was supposed to host a game‑night dinner, and the kitchen was a chaotic mess of half‑cooked rice, a burnt skillet, and a stack of empty take‑out boxes. I stared at the mess and thought, “If only I could turn this disaster into a crowd‑pleaser.” That moment sparked the birth of the Sheet Pan Quesadillas: Easy, C. The idea was simple: a single pan, a handful of ingredients, and a promise of crispy, cheesy goodness that would make even the most skeptical of friends beg for seconds. I dared you to taste this and not go back for a second, and I’m still convinced it’s hands down the best version you’ll ever make at home.
Picture the scene: a sheet pan gleaming under the kitchen lights, the aroma of melted cheese mingling with the smoky scent of sautéed onions and peppers. The sound of sizzling oil is the soundtrack to a culinary triumph, and the heat radiating from the pan feels like a warm hug. When you lift the first golden slice, the crunch is audible—like a crisp bite of fresh corn on a summer day. The colors are a vibrant palette: deep red of the bell pepper, golden edges of the tortillas, and a riot of melted cheese that glistens like molten gold. This isn’t just a meal; it’s an experience that turns an ordinary evening into a fiesta.
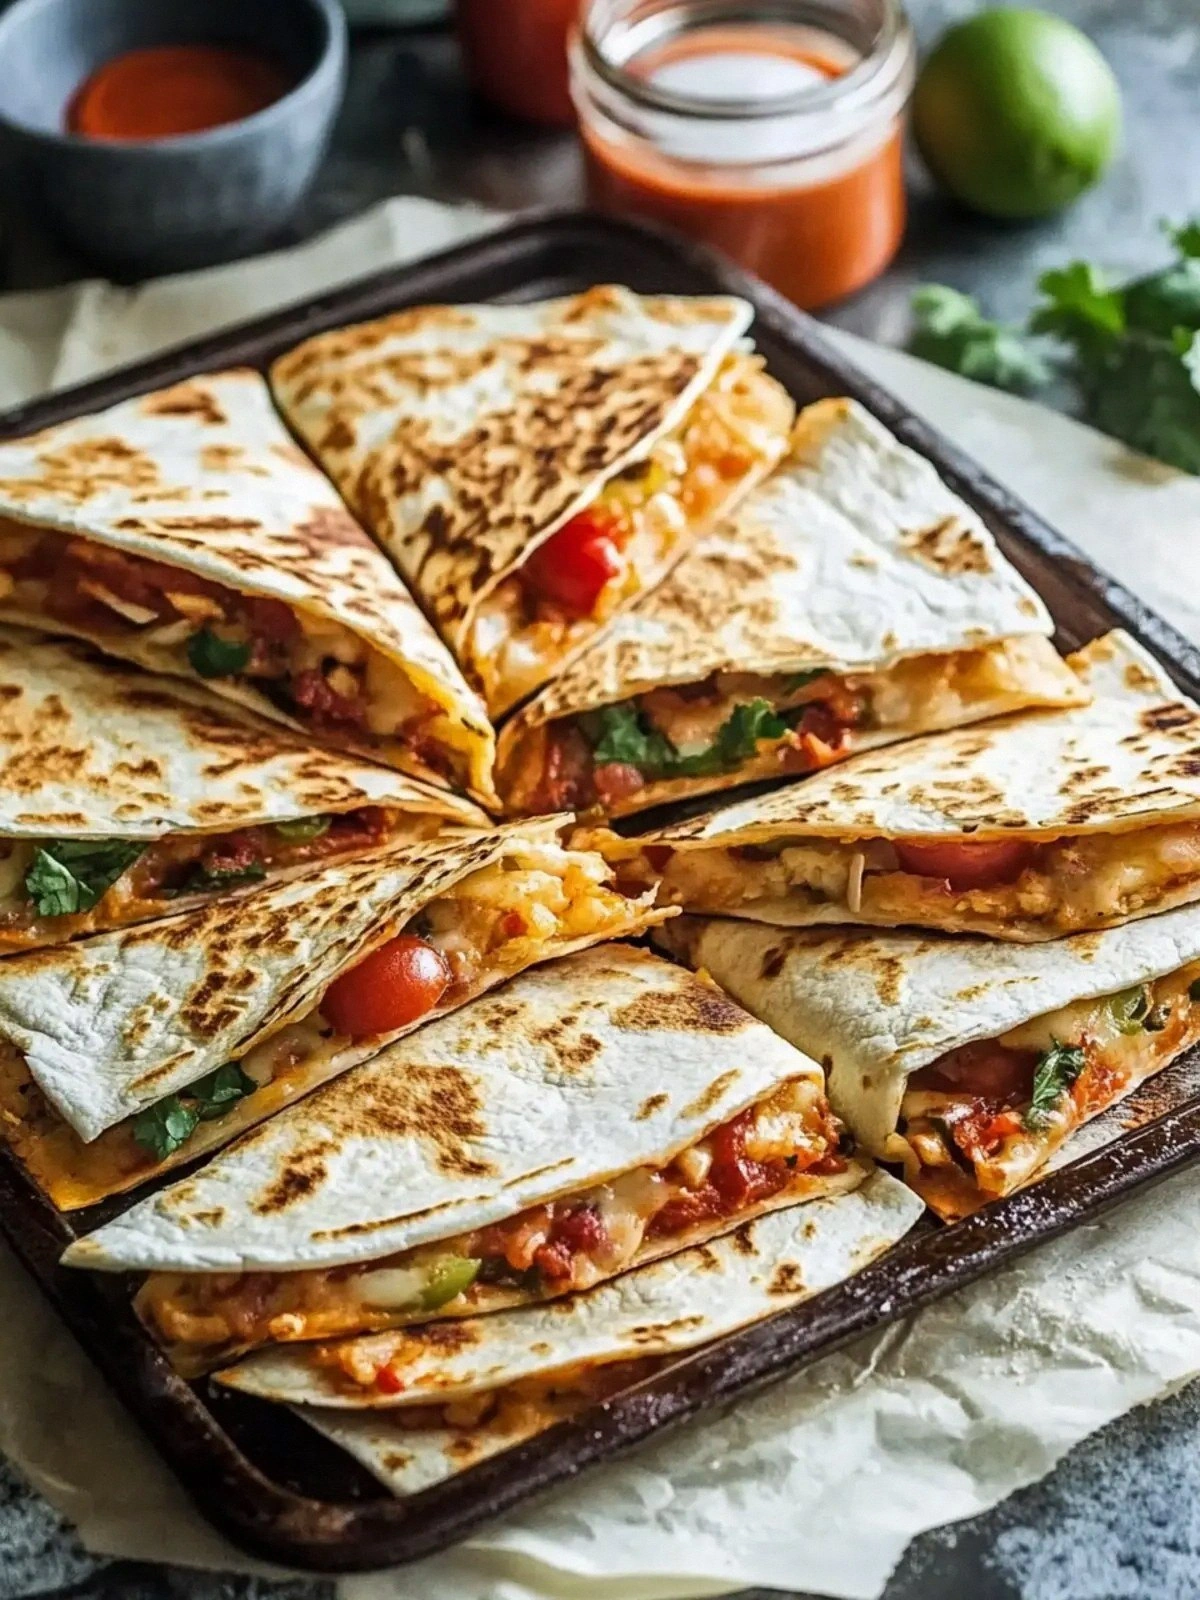
What sets this recipe apart is not just the simplicity, but the intentional layering of flavors and textures. The combination of shredded chicken and Mexican blend cheese creates a savory depth that feels comforting yet exciting. The red bell pepper adds a sweet crunch that balances the richness of the cheese, while the onions bring a subtle sharpness. The seasoned tortilla base acts as the perfect canvas, absorbing the spices without becoming soggy. Every bite is a dance of crispy edges, gooey cheese, and a burst of fresh salsa that cuts through the heaviness.
I’ll be honest—before I perfected this, I’d burned the tortillas, over‑seasoned the filling, and ended up with a sad, soggy mess. But with a few tweaks, this sheet‑pan version turned into a showstopper. The secret? A light coating of olive oil, a precise mix of chili powder and cumin, and a quick toss of fresh salsa right before serving. The result is a sheet pan that’s practically a work of art: golden, crispy, and utterly irresistible. Let me walk you through every single step—by the end, you’ll wonder how you ever made it any other way.
What Makes This Version Stand Out
- Flavor: The blend of chili powder, cumin, and garlic powder creates a smoky, earthy base that elevates the chicken without overpowering it. The fresh salsa and guacamole add brightness that cuts through the richness.
- Texture: Crispy tortilla edges contrast with molten cheese, while the diced bell pepper offers a satisfying snap. The quick sear on the sheet pan locks in moisture.
- Convenience: All ingredients are assembled on one sheet pan—no separate pans, no extra dishes to wash. The whole process takes less than an hour.
- Versatility: Swap the chicken for beef, shrimp, or tofu, and you have a new dish. The recipe scales perfectly for parties or a quiet family dinner.
- Visual Appeal: The vibrant colors of bell pepper and melted cheese make for Instagram‑worthy plating that will impress guests.
- Make‑Ahead Friendly: Assemble the sheet pan, refrigerate, and bake when needed. This is the ultimate pre‑meal strategy for busy nights.
Alright, let's break down exactly what goes into this masterpiece…
Inside the Ingredient List
The Flavor Base
The chili powder, cumin, and garlic powder aren’t just spices; they’re the backbone of the dish. Chili powder brings a gentle heat that lingers on the palate, while cumin adds a nutty warmth that complements the chicken. Garlic powder offers a subtle depth without the raw bite of fresh garlic, keeping the flavor profile smooth. If you’re allergic to cumin, a pinch of smoked paprika can mimic its earthiness.
The Texture Crew
Flour tortillas are the foundation, chosen for their pliability and ability to crisp without cracking. The shredded Mexican blend cheese melts into a silky coating that binds everything together. Diced red bell pepper offers a crisp bite that breaks the monotony of gooey cheese, and onions add a caramelized sweetness when sautéed briefly. Together, they create layers of crunch, melt, and savory bite.
The Unexpected Star
Cooked, shredded chicken is the unexpected star that turns a simple quesadilla into a protein‑rich centerpiece. It’s pre‑cooked, so you can use rotisserie chicken or a leftover roast for convenience. The chicken’s natural juices mingle with the cheese, creating a savory broth that keeps the tortillas from drying out. If you’re vegetarian, swap the chicken for roasted chickpeas or sautéed mushrooms for a hearty alternative.
The Final Flourish
Fresh salsa, guacamole, and sour cream aren’t just toppings; they’re the finishing touch that turns a plate of quesadillas into a full‑spectrum flavor experience. The salsa adds a zesty, vinegary bite that cuts through the richness, while guacamole offers creamy, buttery undertones. Sour cream provides a cool, tangy finish that balances the heat from the spices. Together, they elevate the dish from simple to sensational.
Everything’s prepped? Good. Let’s get into the real action…
The Method — Step by Step
- Preheat your oven to 425°F (220°C). Line a large sheet pan with parchment paper to prevent sticking and make cleanup a breeze. This high temperature is key to achieving that golden, crispy edge on the tortillas.
- In a large bowl, combine the shredded chicken, diced red bell pepper, diced onion, chili powder, cumin, garlic powder, salt, and pepper. Toss everything together until the vegetables and chicken are evenly coated with spices. The seasoned mixture will create a flavorful base that’s ready to layer.
- Lay the flour tortillas out flat on the prepared sheet pan. Spread a thin layer of olive oil over each tortilla using a pastry brush; this step ensures the tortillas crisp up nicely and don’t stick to the pan. If you’re using a non‑stick pan, you can skip the oil for a slightly lower fat version.
- Evenly distribute the seasoned chicken mixture over each tortilla, leaving a small border around the edges. The filling should be generous but not so thick that it overwhelms the tortilla. This is the moment of truth—watch how the colors pop.
- Sprinkle the shredded Mexican blend cheese over the chicken mixture. The cheese acts as a binder, holding everything together while it melts into a golden, bubbly coating. Don’t be shy—more cheese equals more gooey bliss.
- Fold each tortilla in half, pressing gently to seal the edges. The fold creates a pocket that traps the heat, allowing the cheese to melt evenly. If you prefer a more rustic look, leave them open and let the cheese drip over the sides.
- Place the sheet pan in the preheated oven and bake for 12–15 minutes, or until the cheese is melted and the tortilla edges are golden brown. The aroma that fills the kitchen will have everyone’s mouth watering. Keep an eye on the edges; they should start pulling away from the pan but not burn.
- Remove the sheet pan from the oven and let the quesadillas cool for 2 minutes before cutting. This short rest allows the cheese to set slightly, preventing it from oozing out of the folds. Slice into wedges with a pizza cutter for a clean, professional look.
- Serve immediately with fresh salsa, guacamole, and a dollop of sour cream on the side. The combination of hot, melty quesadillas with cool, tangy toppings creates a harmonious balance of flavors and textures. Enjoy while they’re still warm—trust me, they’ll disappear fast.
That’s it—you did it. But hold on, I’ve got a few more tricks that will take this to another level.
Insider Tricks for Flawless Results
The Temperature Rule Nobody Follows
Many cooks bake at a lower temperature, which results in soggy tortillas. The trick is to use a high heat—425°F—so the tortillas crisp up while the cheese melts. If your oven doesn’t reach that temperature, bake at 400°F and add an extra 2 minutes. This small change can mean the difference between a crunchy masterpiece and a limp mess.
Why Your Nose Knows Best
The first aroma you detect is the sizzling of onions and peppers. That smell is a cue that the veggies are caramelizing just right. If you smell burnt onions, lower the heat. Your nose is the best judge of doneness—trust it.
The 5‑Minute Rest That Changes Everything
After baking, let the quesadillas rest for exactly five minutes before cutting. This short pause lets the cheese set, preventing it from oozing out of the folds and ruining the presentation. I once cut them immediately and ended up with a cheese avalanche on the cutting board.
Cheese Swap for a Vegan Twist
If you’re going dairy‑free, use a vegan cheese that melts well, like Daiya or Follow Your Heart. The texture will be similar, but the flavor profile shifts slightly toward a nuttier taste. Pair with a vegan sour cream for a cohesive plant‑based version.
Keeping the Tortillas from Cracking
Before baking, lightly brush each tortilla with a little olive oil. This creates a protective barrier that prevents the tortilla from cracking under the weight of the filling. If you’re using corn tortillas, add a pinch of salt to the oil to enhance the flavor.
Scaling for a Crowd
When cooking for a large group, double the recipe and use two sheet pans side by side. Keep the pans at the same distance from the heat source to ensure even cooking. If you’re short on oven space, bake in batches and keep the finished quesadillas warm in a low‑heat oven (200°F) while you finish the next batch.
Creative Twists and Variations
This recipe is a playground. Here are some of my favorite ways to switch things up:
Mexican Street‑Taco Quesadilla
Swap the shredded chicken for ground beef seasoned with taco seasoning. Add a handful of fresh cilantro and a squeeze of lime juice before baking. Serve with a side of pico de gallo for an extra burst of freshness.
Southwestern Veggie Delight
Replace the chicken with black beans, corn, and diced jalapeños. Use a blend of cheddar and Monterey‑Jack for a milder cheese. This version is perfect for vegetarians and adds a pop of color.
Breakfast Power Quesadilla
Add scrambled eggs to the filling, along with a sprinkle of chorizo or bacon bits. Top with a little salsa verde. This makes for a hearty, on‑the‑go breakfast that’s both filling and flavorful.
Cheesy Broccoli Fusion
Incorporate steamed broccoli florets into the chicken mixture and add a dash of lemon zest. The broccoli adds a subtle bitterness that balances the richness of the cheese.
Asian Fusion Twist
Use diced cooked pork or chicken with a splash of soy sauce, ginger, and a pinch of sesame oil. Top with sliced scallions and a drizzle of sriracha before serving for an umami‑rich variation.
Sweet & Savory Bacon Quesadilla
Crumbled bacon and a drizzle of maple syrup give this version a sweet‑savory profile. The maple syrup caramelizes slightly, creating a caramelized crust on the tortilla edges.
Storing and Bringing It Back to Life
Fridge Storage
Store leftover quesadillas in an airtight container for up to 3 days in the refrigerator. Reheat in a toaster oven or skillet for a crisp finish. This method preserves the cheese’s gooeyness without turning the tortillas soggy.
Freezer Friendly
Wrap individual quesadillas in parchment paper, place them in a freezer bag, and store for up to 2 months. When ready to eat, thaw overnight and reheat in the oven at 350°F for 10 minutes. The tortillas will regain their crispness.
Best Reheating Method
Add a tiny splash of water to the bottom of a skillet before reheating. The steam will keep the tortillas from drying out while the cheese melts to perfection. Cover for 2 minutes and then remove the lid to let excess moisture evaporate.