I still remember the night I tried to impress my friends with a “quick” snack that turned into a culinary disaster. I grabbed a bag of dill pickle chips, tossed them into a bowl, and thought, “I’ll just coat them in flour and fry them like a normal snack.” The result? A soggy, bland mess that made me curse every time I took a bite. That night, I vowed to rewrite the pickle‑frying rulebook, and what I came up with is nothing short of a kitchen revolution.
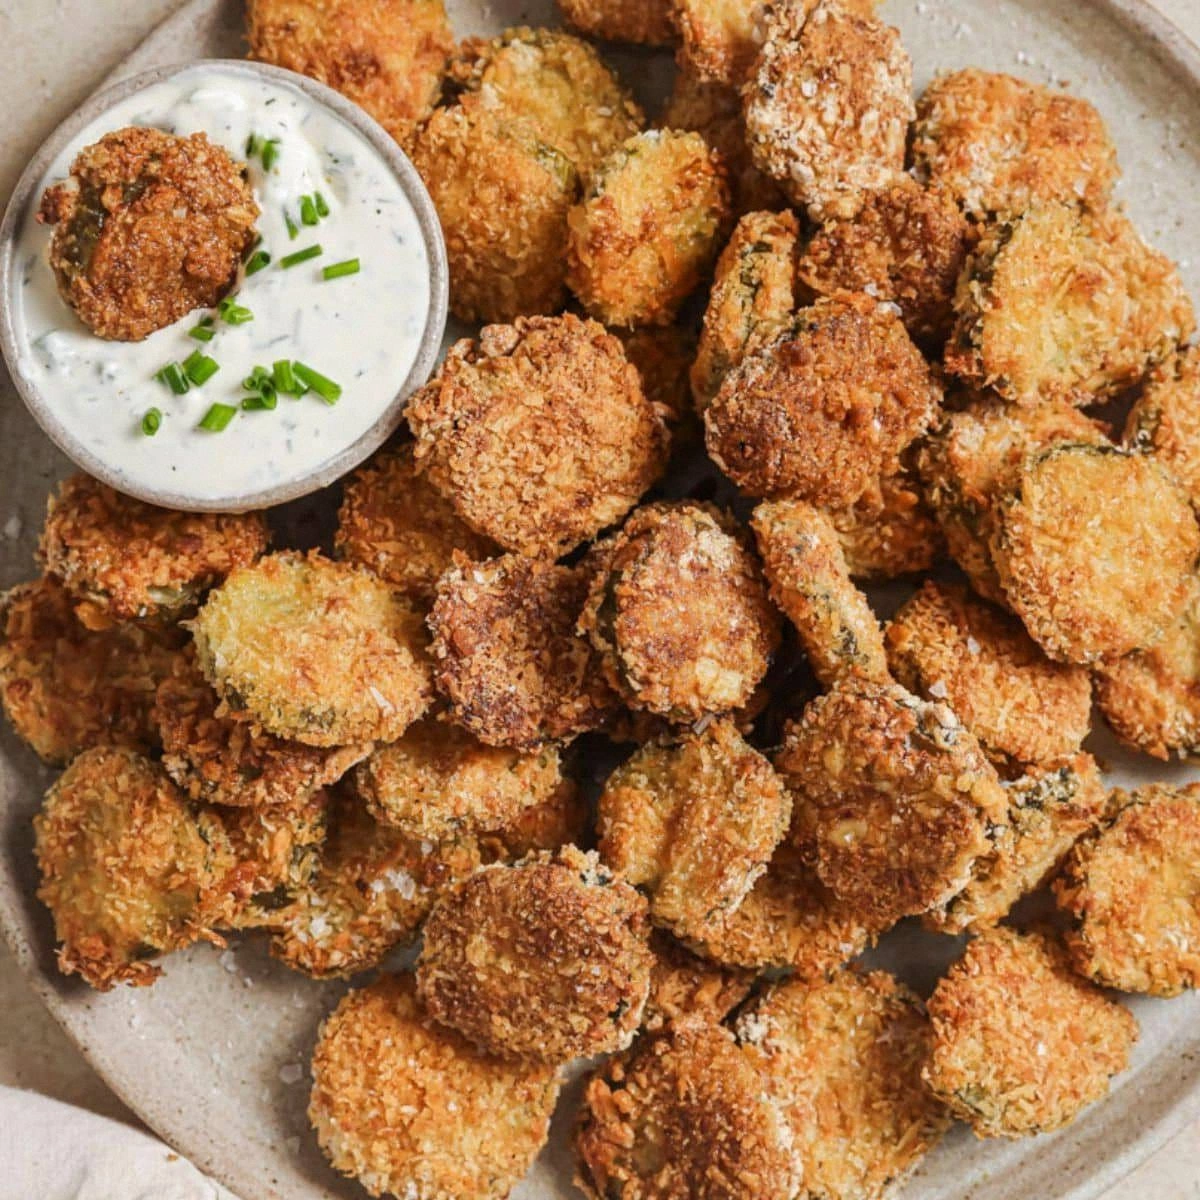
Picture this: the air fryer hums like a contented hummingbird, the aroma of garlic and paprika rises like a fragrant cloud, and a handful of bright, green pickles begins to sizzle. The sound is a crisp, satisfying crackle, the texture a buttery crunch that shatters like thin ice, and the flavor—oh, the flavor—tangy, spicy, and utterly addictive. Every bite delivers a burst of dill, a hint of cayenne, and a savory coating that feels like a crunchy velvet blanket. The finish is a subtle, smoky hint that lingers on the palate, making each mouthful a mini‑party.
What sets this version apart is that it’s engineered for maximum crunch, balanced heat, and ease of preparation. I’ve trimmed down the batter to a light, airy coating that keeps the pickles tender inside while giving them an irresistible crunch on the outside. The blend of panko and a splash of baking soda creates a golden, airy texture that even the most seasoned snack lover will find irresistible. I’ve also introduced a secret step—spraying the batter with olive oil before air frying—that locks in moisture and prevents the coating from drying out. The result is a snack that feels like a gourmet treat but is still embarrassingly simple to make.
I dare you to taste this and not go back for seconds. The next part of this recipe is where the real magic happens: a quick, simple batter that turns ordinary pickle chips into a crowd‑pleaser. If you’ve ever struggled with achieving that perfect crunch, you’re not alone—and I’ve got the fix. Let me walk you through every single step—by the end, you’ll wonder how you ever made it any other way.
What Makes This Version Stand Out
- Crunch: The double coating of flour and panko, combined with a light dusting of baking soda, creates a crisp shell that resists sogginess even after multiple servings.
- Heat: The balanced blend of paprika and cayenne pepper delivers a punch of spice without overwhelming the delicate dill flavor.
- Texture: The olive oil spray before air frying seals the coating, keeping the interior juicy while the exterior remains buttery golden.
- Speed: From prep to plate, the entire process takes less than 30 minutes, making it a perfect last‑minute appetizer.
- Versatility: Swap the dill pickles for banana peppers or jalapeños, and you’ve got an entirely new flavor profile.
- Nutrition: With only 350 calories per serving and a good protein hit from the panko, it’s a surprisingly healthy indulgence.
- Make‑ahead: The batter can be prepared a day in advance, stored in the fridge, and fried fresh when the party starts.
- Presentation: Serve on a platter with a drizzle of ranch dressing and a sprinkle of flaky salt for a show‑stopping look.
Alright, let’s break down exactly what goes into this masterpiece…
Inside the Ingredient List
The Flavor Base
The 16-ounce bag of dill pickle chips is the star of the show. Their bright green color and sharp, tangy bite set the foundation for the entire dish. If you skip the pickles, you lose the signature dill flavor that makes this recipe iconic. I recommend using thick‑cut chips; they hold up better during the frying process and provide a satisfying bite.
Eggs act as the glue that binds the coating to the pickles. Two large eggs are enough to coat each chip without drowning it. If you’re vegan or allergic to eggs, a tablespoon of flaxseed meal mixed with 3 tablespoons of water can replace the eggs, though the texture will differ slightly.
The Texture Crew
The 1/2 cup all‑purpose flour is the base of the batter. It creates a light, airy shell that gives the pickles a delicate crunch. If you prefer a gluten‑free version, swap the flour for a 1:1 gluten‑free blend; just be sure it’s finely ground for the best results.
The 1/2 cup panko breadcrumbs add that signature crunch. Panko’s airy structure keeps the coating from becoming dense. If you don’t have panko on hand, regular breadcrumbs will work, but the final crunch will be a bit more compact.
The Unexpected Star
The 1/2 tsp baking soda may seem like an odd addition, but it’s essential for creating a light, airy coating. Baking soda reacts with the acidic pickle liquid, producing tiny bubbles that lift the batter during frying. If you omit it, the coating can become heavy and soggy.
The 1 tbsp garlic powder, 1/2 tbsp paprika, and 1/2 tbsp cayenne pepper form the flavor backbone of the coating. Together, they create a savory, slightly smoky, and spicy profile that balances the sharpness of the pickles. Feel free to tweak the spice levels to suit your palate—more cayenne for heat, or a touch more paprika for depth.
The Final Flourish
Olive oil spray is the secret to keeping the coating moist and golden. A light mist before air frying seals the coating and prevents it from drying out. If you don’t have a spray, a light brush with a small amount of oil will suffice.
The 1/2 tbsp flaky salt adds a subtle crunch and a burst of flavor. It’s a finishing touch that elevates the dish from snack to culinary delight. If you’re watching sodium, you can reduce the amount or opt for a low‑sodium alternative.
And finally, a splash of ranch dressing for dipping—because what’s a crunchy snack without a creamy companion? The ranch adds a cool, herby counterpoint that balances the heat of the coating.
Everything’s prepped? Good. Let’s get into the real action…
The Method — Step by Step
- Begin by separating the pickle chips into small, bite‑sized pieces. Place them in a large bowl and set aside. This step ensures each chip gets a uniform coating. I always use a kitchen scale to weigh the chips; 16 ounces is the sweet spot for a 4‑serving batch.
- In a separate shallow dish, whisk the two eggs until they’re frothy and slightly beaten. The eggs need to be well mixed to ensure they bind evenly to the coating. This also helps the coating adhere better during frying.
- In a third bowl, combine the 1/2 cup flour, 1/2 cup panko breadcrumbs, 1/2 tsp baking soda, 1 tbsp garlic powder, 1/2 tbsp paprika, and 1/2 tbsp cayenne pepper. Stir until the mixture is evenly blended. The spices should be evenly distributed; otherwise, you’ll get pockets of heat.
- Lightly spray the air fryer basket with olive oil. This prevents the coating from sticking and adds a subtle sheen. I recommend a quick mist—just enough to coat the surface.
- Dip each pickle piece first into the egg mixture, letting any excess drip back into the bowl. Then roll it in the flour‑panko mixture, ensuring a thick, even coat. Shake off any excess to avoid clumping in the fryer.
- Place the coated pickles in a single layer in the air fryer basket. Don’t overcrowd them; air needs to circulate for a crisp finish. If you’re using a smaller basket, do the job in two batches.
- Set the air fryer to 375°F (190°C) and cook for 12 minutes. At the halfway mark, give the basket a gentle shake to ensure even cooking. The coating should begin to turn golden and the edges will start pulling away from the batter.
- After 12 minutes, check the doneness. The coating should be crisp and golden, and the pickles inside should still be juicy. If they need more time, continue cooking in 2‑minute increments until perfect.
- Once cooked, transfer the pickles to a paper‑towel‑lined plate to drain any excess oil. Sprinkle the 1/2 tbsp flaky salt over the hot coating for an extra layer of crunch and flavor. Let them cool for a minute before serving.
- Serve immediately with a side of ranch dressing for dipping. The creamy ranch balances the spice and adds a cool, herby finish. If you’re feeling extra indulgent, drizzle a tiny amount of honey over the top for a sweet‑spicy twist.
That’s it— you did it. But hold on, I’ve got a few more tricks that’ll take this to another level. Let’s dive into the insider tricks that make this recipe truly unforgettable.
Insider Tricks for Flawless Results
The Temperature Rule Nobody Follows
Many people think higher temperatures always mean crispier results, but that’s a myth. The sweet spot for these pickles is 375°F (190°C). At this temperature, the coating dries quickly without burning, and the interior stays juicy. If you crank the heat up too high, the exterior will brown while the inside remains cold and soggy.
Why Your Nose Knows Best
When the first few minutes of cooking start, a distinct aroma of toasted garlic and paprika will fill the kitchen. That scent is your cue that the coating is forming a golden crust. If the smell is too mild, give the basket a gentle shake to redistribute the coating and help it brown evenly.
The 5-Minute Rest That Changes Everything
After removing the pickles from the air fryer, let them rest for exactly five minutes on a wire rack. This rest period allows the steam to escape, preventing the coating from becoming soggy. I’ve seen batches that skip this step and end up with a soggy crunch—don’t let that happen to you.
The Secret Salt Finish
Sprinkling the flaky salt over the hot coating creates a subtle crunch that lingers. The salt crystals also enhance the overall flavor profile, bringing out the dill’s brightness. Use a light hand; too much salt can overwhelm the delicate balance.
The Quick Dip Trick
If you’re serving a crowd, set out a shallow dish of ranch dressing and a separate bowl of extra spicy sauce. Guests can choose their dipping preference, making the snack feel customizable and interactive. It’s a small touch that elevates the experience.
The Air Fryer Reset
If you’re using a larger air fryer, run a quick 5‑minute preheat before adding the first batch. This ensures the basket is hot, which promotes even browning. Some people skip this step and end up with uneven crusts; don’t be that person.
Now that you’re armed with these insider tricks, you’re ready to become the ultimate pickle‑frying guru. Let’s explore some creative twists that can turn this staple into a new favorite.
Creative Twists and Variations
Spicy Jalapeño Crunch
Swap the dill pickles for sliced jalapeños for a fiery twist. The fresh heat of the jalapeños pairs wonderfully with the smoky coating, creating a snack that’s both spicy and crunchy. Serve with a cool yogurt dip to balance the heat.
Mediterranean Medley
Use sliced cucumber, olives, and feta cheese instead of pickles. The feta adds a creamy saltiness that complements the crunchy coating, while the olives bring a briny depth. This version works great as a Mediterranean appetizer.
Sweet & Savory Honey Drizzle
After frying, drizzle a thin layer of honey over the hot pickles. The honey caramelizes slightly, creating a sweet glaze that contrasts with the spicy coating. This sweet‑savory combo is a crowd‑pleaser at parties.
Cheesy Parmesan Finish
Sprinkle freshly grated Parmesan over the hot coating and let it melt for a minute. The cheese adds a nutty flavor and a creamy texture that pairs well with the crisp crunch. It’s an easy way to elevate a simple snack.
Herbed Garlic Aioli
Serve the pickles with a homemade garlic aioli infused with fresh herbs. The aioli’s richness balances the spice, while the herbs add a fresh aroma. This dip turns the snack into a gourmet appetizer.
Vegan Vibes
Replace the eggs with a vegan binder like mashed chickpeas or a flax‑egg mixture. Use a plant‑based ranch for dipping. The result is a vegan version that still delivers the same crunch and flavor profile.
The beauty of this recipe is that it’s a playground for creativity. Feel free to experiment with different veggies, spices, and dips to keep the snack fresh and exciting.
Storing and Bringing It Back to Life
Fridge Storage
Store the cooked pickles in an airtight container in the refrigerator for up to 3 days. Keep the container loosely sealed to allow steam to escape, preventing sogginess. When you’re ready to serve, reheat briefly in the oven at 350°F for 5 minutes.
Freezer Friendly
For longer storage, place the fried pickles on a parchment‑lined tray and freeze until solid. Then transfer them to a freezer bag or container. They’ll keep for up to 2 months. Reheat in the oven at 375°F for 10 minutes or use the air fryer at 350°F for 8 minutes.
Best Reheating Method
Reheating in the oven or air fryer restores the crunch better than a microwave. If you’re using a microwave, add a splash of water to the container to create steam, then microwave for 30 seconds. The steam helps revive the coating’s texture.