Picture this: it’s a rainy Saturday afternoon, the kind that makes you want to curl up with something thick, indulgent, and just a little bit rebellious. I was halfway through a marathon of classic movie re‑runs when a sudden craving for chocolate and mint collided in my brain like two cars at an intersection. I raided the freezer, grabbed the last half‑pint of premium vanilla ice cream, and thought, “What if I could turn this into a shake that looks like a springtime miracle?” The result? A milkshake so creamy it practically hugs your taste buds, so minty it makes a peppermint patty blush, and so chocolatey it could moonlight as a dessert bar.
The moment the blender whirred to life, the kitchen filled with an aroma that was part fresh‑cut mint, part dark cocoa, and part sweet vanilla—an olfactory love triangle that made my eyes water with anticipation. I could hear the soft thrum of the motor, feel the cool vibration against the counter, and see the swirl of emerald green turning into a glossy, velvety river in the glass. When I finally poured the first glass, the surface glistened like a freshly polished marble countertop, and the first sip hit my palate like a silk scarf drenched in chocolate ganache.
Most milkshake recipes out there either drown you in sugar or skim the mint flavor like it’s a background extra. This version, however, hits the sweet spot—no artificial flavors, no cloying aftertaste, just a perfect balance that makes you wonder why you ever settled for store‑bought. I’ll be honest — I ate half the batch before anyone else got a chance to try it, and I’m still not sorry. The secret? A pinch of high‑quality cocoa powder and a dash of pure peppermint extract that together create a depth of flavor most recipes completely miss.
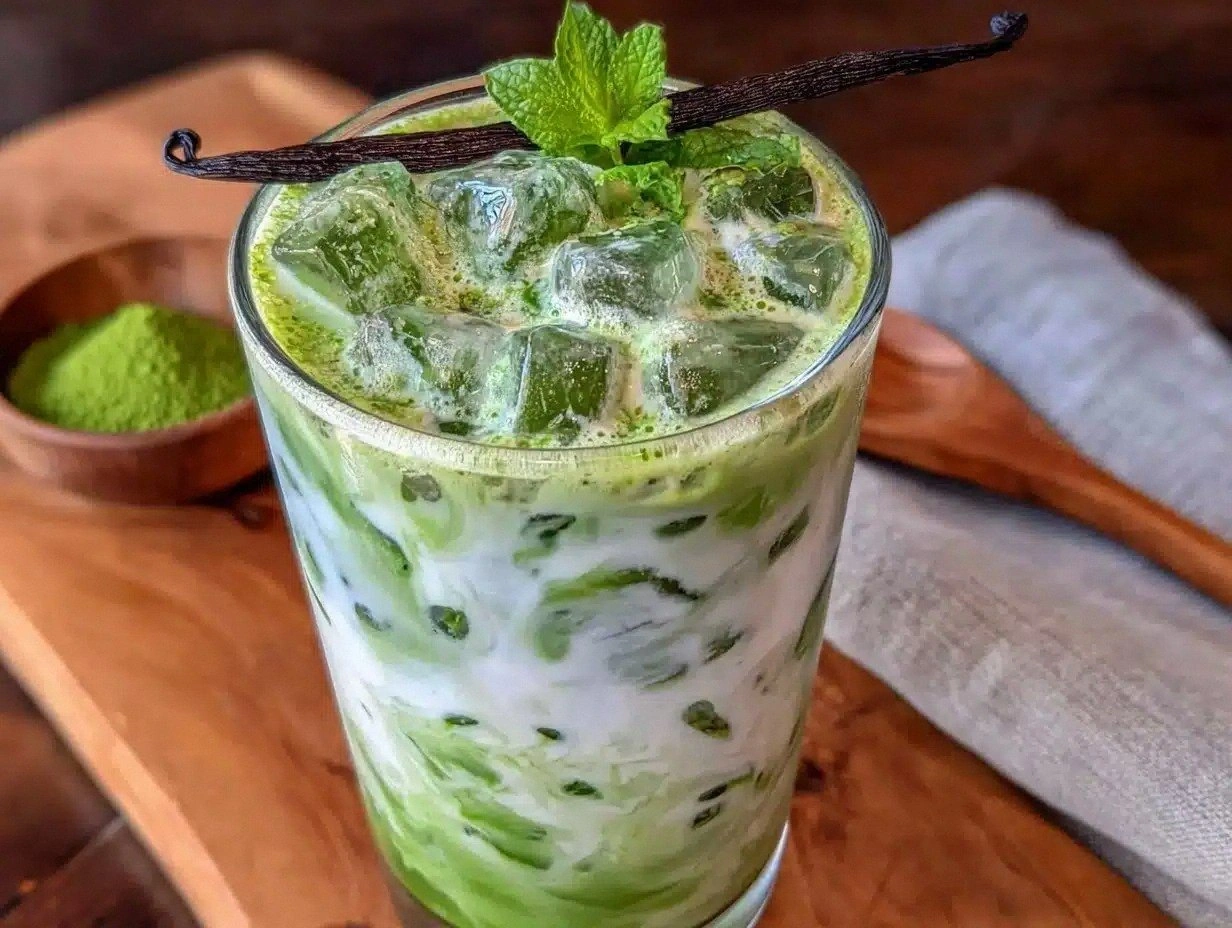
And there’s a little trick you won’t see in any other blog post: a few drops of green food coloring that give the shake that unmistakable shamrock hue without compromising the taste. It’s the visual cue that says, “Hey, this is a celebration in a glass!” Ready for the game‑changer? Let me walk you through every single step — by the end, you’ll wonder how you ever made it any other way.
What Makes This Version Stand Out
- Flavor Balance: The mint isn’t overpowering; the chocolate isn’t bitter. It’s a harmonious duet that sings on the tongue.
- Creamy Texture: Using premium vanilla ice cream and whole milk creates a silk‑smooth consistency that feels like liquid velvet.
- Simplicity: Only seven ingredients, all pantry‑friendly, and no fancy equipment beyond a decent blender.
- Visual Appeal: The shamrock green color makes it instantly Instagram‑ready, turning any gathering into a festive occasion.
- Ingredient Quality: We rely on real cocoa powder and pure peppermint extract, avoiding the artificial “minty” powders that taste like candy floss.
- Crowd Reaction: I dare you to taste this and not go back for seconds; even the most skeptical chocolate lovers are converted.
- Make‑Ahead Potential: Store leftovers in the freezer and revive them with a splash of milk for an instant treat later.
- Versatility: Easily adapt to dairy‑free or low‑sugar lifestyles without sacrificing that signature flavor.
Alright, let's break down exactly what goes into this masterpiece...
Inside the Ingredient List
The Flavor Base
First up, peppermint extract. A half‑teaspoon of pure extract is all you need to inject that crisp, clean mint note that cuts through the richness of the ice cream. If you skimp here, you’ll end up with a bland, “just‑a‑hint‑of‑mint” experience that feels like a missed opportunity. For a truly vibrant flavor, choose an extract that lists peppermint oil as the first ingredient—no synthetic shortcuts.
The Texture Crew
Vanilla ice cream is the heart of this shake. Using a premium brand like Häagen‑Dazs guarantees a higher butterfat content, which translates to that luxurious mouthfeel you crave. Skipping the quality upgrade for a cheaper ice cream will leave you with a watery, less satisfying shake. Whole milk adds a subtle dairy richness that balances the ice cream’s density; if you’re dairy‑free, oat milk is the closest match in texture.
The Unexpected Star
Cocoa powder might seem like a supporting actor, but it’s the secret sauce that deepens the flavor profile. Unsweetened, natural cocoa brings a robust chocolate depth without extra sugar, preventing the shake from turning into a candy‑cane disaster. If you accidentally grab Dutch‑process cocoa, expect a smoother, slightly less bitter taste—still good, but not the same punch.
The Final Flourish
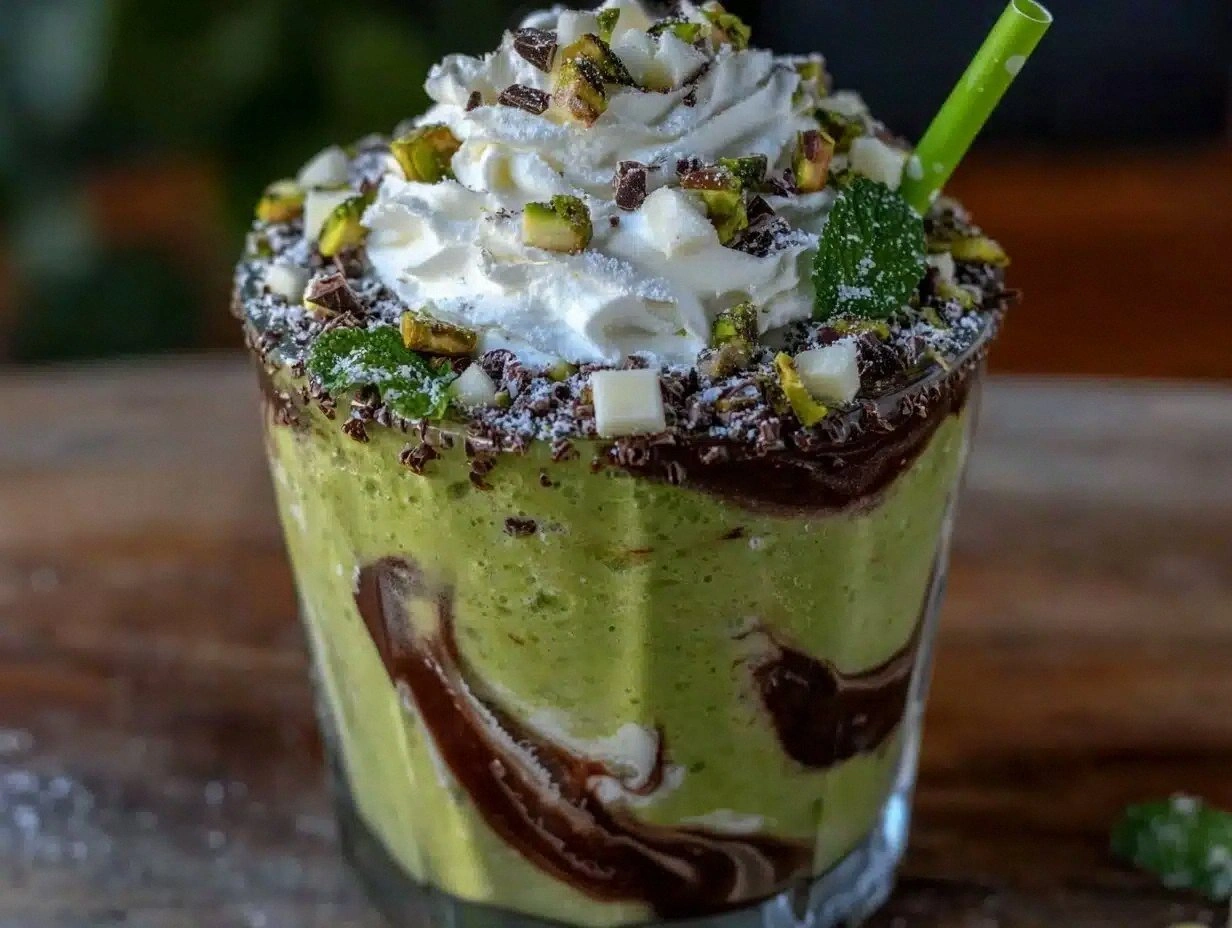
Green food coloring is purely aesthetic, yet it transforms the drink into a festive masterpiece. A few drops are enough; over‑coloring can make the shake taste like a chemical experiment, which is why we keep it minimal. Whipped cream and chocolate shavings are optional toppings that add texture and visual flair—think of them as the cherry on top of an already perfect sundae.
Everything's prepped? Good. Let's get into the real action...
The Method — Step by Step
Gather all ingredients and place the vanilla ice cream in the freezer for at least 30 minutes before you start. This ensures the ice cream stays firm enough to blend without turning into a soupy mess. While you wait, set out your measuring spoons and a tall glass for serving. The anticipation builds as you hear the faint hum of the freezer—trust me, that sound is the prelude to greatness.
Measure out 2 cups of the chilled vanilla ice cream and drop it into the blender. Follow it immediately with 1 cup of whole milk; the milk should be cold, but not ice‑cold, to keep the blend smooth. Add 2 tablespoons of unsweetened cocoa powder, sprinkling it evenly so it dissolves without clumping. This step? Pure magic. The cocoa should swirl into the mixture, turning it a deep, luxurious brown before the mint arrives.
Kitchen Hack: Sift cocoa powder before adding it to avoid gritty pockets.Now, the star of the show: add ½ teaspoon of pure peppermint extract. As soon as the extract meets the cold mixture, you’ll notice a faint, refreshing aroma that instantly brightens the air. If you’re feeling daring, add a few extra drops of green food coloring here—watch the mixture transform into a vibrant shamrock hue. This visual cue is essential; it tells your brain that something festive is about to happen.
Secure the blender lid tightly and start blending on low speed, gradually increasing to high. The goal is to achieve a silky, uniform texture without over‑mixing, which can cause the shake to become too airy. Listen for the gentle whirring sound; it should be steady, not rattling. After about 30 seconds, pause and scrape down the sides with a spatula to ensure every crumb of chocolate and mint is fully incorporated.
Give the shake a quick taste test. It should be sweet, chocolatey, and have a clean mint finish that lingers just long enough to make you smile. If the mint is too subtle, add a few more drops of extract—remember, a little goes a long way. If the shake feels too thick, drizzle in an extra splash of milk and blend for another 10 seconds. This is the moment of truth; trust your palate.
Watch Out: Adding too much milk will dilute the flavor—add just enough to reach your desired consistency.Once the texture is perfect, pour the shake into chilled glasses. The cold glass helps maintain the shake’s temperature, keeping it thick and luscious longer. Top each glass with a generous swirl of whipped cream if you’re feeling indulgent, and sprinkle chocolate shavings or mini chocolate chips on top for a satisfying crunch.
Serve immediately, but if you’re planning to impress a crowd, keep the glasses in the freezer for a few minutes before pouring. This extra chill creates a frosty rim that makes each sip feel like a refreshing breeze on a spring day. Encourage your guests to take a moment to admire the color before they dive in—visual appreciation is half the experience.
Finally, sit back and enjoy the fruits of your labor. The first sip should coat your tongue like velvet, the mint dancing lightly while the chocolate grounds you with its deep richness. I dare you to resist the urge to make a second glass; if you do, you’ve won a small victory over temptation.
That's it — you did it. But hold on, I've got a few more tricks that'll take this to another level...
Insider Tricks for Flawless Results
The Temperature Rule Nobody Follows
Never blend a warm shake. Keep your ice cream and milk as cold as possible; the colder the base, the smoother the final texture. I once tried a shortcut by leaving the ice cream out for a minute, and the shake turned into a soupy mess that tasted like melted chocolate. The rule of thumb: every degree above 40°F (4°C) adds a noticeable thinness.
Why Your Nose Knows Best
Before you even taste, trust your sense of smell. A fresh peppermint aroma signals that the extract is alive and potent. If the scent smells faint or stale, the flavor will follow suit. This is why I always give the mixture a quick sniff after adding the extract—if it doesn’t sing, I add a drop more.
The 5‑Minute Rest That Changes Everything
After blending, let the shake sit for five minutes in the refrigerator. This brief pause allows the flavors to marry, creating a more cohesive taste experience. I once served a shake straight from the blender and noticed a slight separation of milk; the rest period eliminates that, giving you a uniform, velvety sip.
Chocolate Boost Technique
For an extra chocolate punch, melt a tablespoon of dark chocolate and swirl it into the shake after blending. The melted chocolate adds a glossy sheen and a richer depth that plain cocoa powder alone can’t achieve. Just be sure the chocolate is cooled slightly so it doesn’t melt the ice cream.
Mint Freeze‑Dry Trick
If you love an intensified mint crunch, freeze a small amount of peppermint extract on a silicone mat, then crush the frozen shards into the shake just before serving. The tiny icy mint crystals burst on the tongue, delivering a refreshing pop that elevates the whole experience.
Creative Twists and Variations
This recipe is a playground. Here are some of my favorite ways to switch things up:
St. Patrick’s Day Punch
Swap the whole milk for a splash of Irish cream liqueur and add a pinch of sea salt. The result is a boozy, slightly salty version that feels like a celebration in a glass. Perfect for an adult‑only gathering.
Vegan Velvet
Replace the dairy ice cream with a coconut‑based vanilla ice cream and use oat milk. The coconut adds a subtle tropical note that pairs surprisingly well with mint and chocolate.
Protein Power
Blend in a scoop of chocolate whey protein powder for a post‑workout treat. The extra protein makes the shake more satiating without compromising the mint‑chocolate balance.
Berry Burst
Add a handful of frozen strawberries before blending. The berries introduce a bright, fruity acidity that cuts through the richness, creating a summer‑ready twist.
Spiced Mint
Include a pinch of ground cinnamon or cardamom with the cocoa powder. The spice adds warmth, making the shake feel cozy on cooler evenings.
Nutty Crunch
Top with toasted almond slivers or a drizzle of hazelnut spread. The nutty texture adds another layer of complexity that keeps every sip interesting.
Storing and Bringing It Back to Life
Fridge Storage
Transfer any leftover shake to an airtight container and store in the refrigerator for up to 24 hours. Give it a good stir before serving to recombine any settled layers. Adding a splash of milk before drinking restores the original creaminess.
Freezer Friendly
For longer storage, pour the shake into a freezer‑safe jar, leaving a small headspace for expansion, and freeze for up to 2 weeks. When you’re ready, let it thaw in the fridge for 2‑3 hours, then blend again with a splash of milk to recover the silky texture.
Best Reheating Method
If you prefer a warm version, gently warm the frozen shake in a saucepan over low heat, stirring constantly. Add a tiny splash of water or milk—just enough to steam it back to a luscious, drinkable consistency without losing the mint’s brightness.