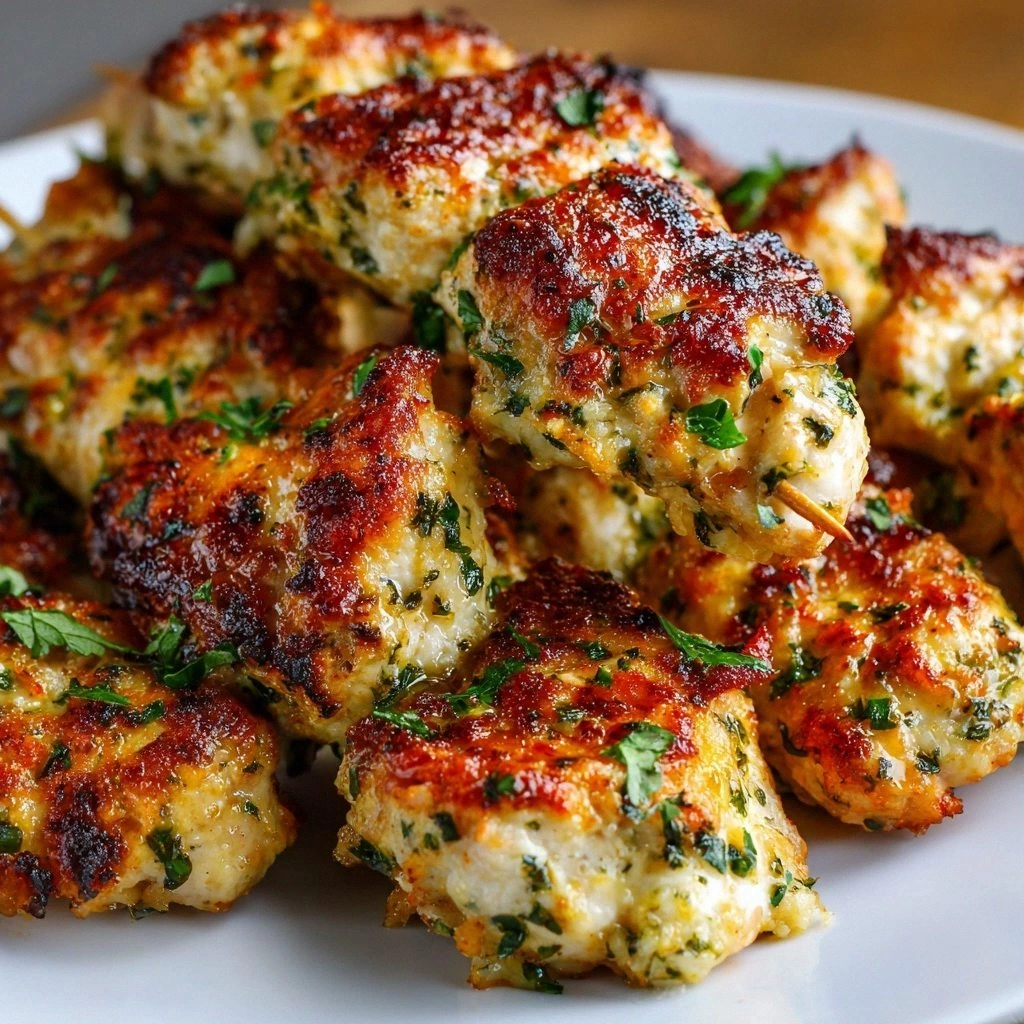
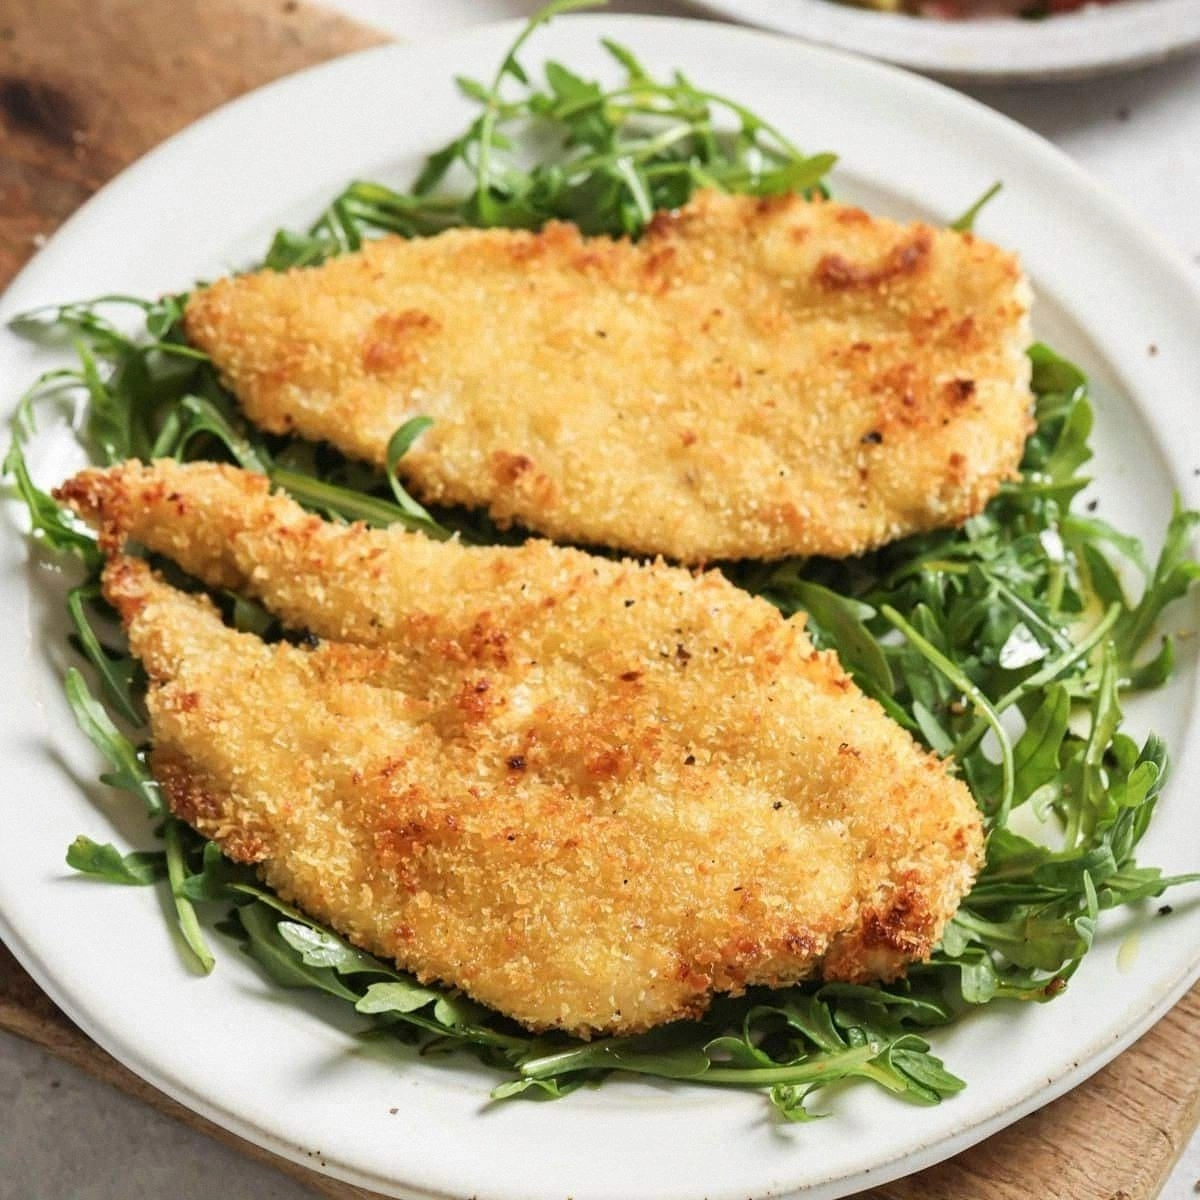
Picture this: a quiet Tuesday evening, a pantry full of ordinary ingredients, and an unexpected craving that demands something crispy, comforting, and utterly satisfying. I was staring at two chicken breasts, a handful of flour, and a box of panko, wondering how to turn that humble combination into a showstopper. The result? Baked Chicken Cutlets that are hands down the best version you'll ever make at home, with a crunch that shatters like thin ice and a tender interior that melts in your mouth. I dare you to taste this and not go back for seconds. The secret lies in a simple technique that elevates each bite to a new level of delicious.
First, I learned that the key to that golden crust is not just the batter, but the way you treat the chicken before you bake it. I sliced the breasts into even cutlets, then patted them dry to remove any excess moisture—because moisture is the enemy of crispness. The aroma that fills the kitchen when you spray a light mist of olive oil on the cutlets is the first hint that something special is happening. Most recipes get this completely wrong, but here's what actually works: a single coat of flour, a quick dip in beaten eggs, and a generous shower of panko. That simple dance of textures turns a plain protein into a party‑ready dish that will have your friends asking for the recipe.
While the ingredients are straightforward, the real magic is in the timing. I discovered that letting the coated cutlets rest for a few minutes before baking allows the panko to cling better and creates a uniform crunch. The oven temperature of 400°F is the sweet spot—hot enough to brown the crust quickly, but gentle enough to keep the chicken juicy. When the first golden specks appear, the kitchen smells like a summer barbecue, and you can almost taste the buttery bite that awaits. If you've ever struggled with soggy chicken, you're not alone—and I've got the fix.
Now, picture yourself pulling this out of the oven, the whole kitchen smelling incredible, and the cutlets sizzling on a plate like a drumroll of flavor. I promise you, the moment you take a bite, the crispy edges will crackle like a fire crack, and the inside will be a tender, juicy masterpiece. And now the fun part—I'll walk you through every single step, from prep to plating, so that by the end you'll wonder how you ever made it any other way. Ready? Let's dive in.
What Makes This Version Stand Out
- Taste: The subtle saltiness from kosher salt elevates the chicken without overpowering it, creating a balanced flavor profile that feels both comforting and sophisticated. The panko adds a gentle nutty undertone that complements the meat's natural taste. This combination turns a simple cutlet into a crowd‑pleasing centerpiece.
- Texture: The layered coating—flour, egg, panko—creates a multi‑dimensional bite. The outer shell crisps to a golden crunch while the interior stays moist and tender. That contrast is the secret to the dish’s addictive appeal.
- Simplicity: With only six pantry staples, the recipe requires minimal prep and no fancy equipment. Even a novice cook can follow along and achieve professional results. It’s the perfect go‑to for busy weeknights.
- Uniqueness: Unlike fried cutlets that rely on deep‑frying, this baked version delivers the same mouth‑watering crunch with less oil and fewer calories. The method preserves the chicken’s juiciness while reducing mess.
- Crowd Reaction: Friends and family rave about the crispness and the buttery finish. The dish is a hit at potlucks, family dinners, and casual gatherings alike. It’s the kind of recipe that turns a simple meal into a memorable experience.
- Ingredient Quality: Using high‑quality panko and fresh eggs makes a noticeable difference. The texture of the breadcrumbs, the shine of the egg wash, and the natural flavor of the chicken all contribute to a superior outcome.
- Cooking Method: Baking at a precise temperature ensures even cooking and browning. The oven’s steady heat creates a consistent crust without the risk of over‑browning or drying out the meat.
- Make‑Ahead Potential: The coated cutlets can be prepared ahead of time, refrigerated, and baked right before serving. This flexibility makes the recipe ideal for meal planning and entertaining.
Alright, let's break down exactly what goes into this masterpiece...
Inside the Ingredient List
The Flavor Base
Kosher salt is the backbone of this dish. It brings out the natural umami of the chicken without making it taste overly salty. A half teaspoon is enough to season the entire batch, so you don’t risk overpowering the delicate flavors. If you’re sensitive to sodium, you can reduce the amount slightly, but the overall taste will still be robust.
All‑purpose flour creates a light, neutral canvas that captures the egg wash and holds the panko in place. It’s essential for forming that first protective layer that prevents the breadcrumbs from sliding off during baking. Choosing a fine‑toasted variety adds a subtle nutty flavor that complements the chicken’s natural sweetness. If you prefer a gluten‑free version, a blend of rice flour and cornstarch works well, but the texture will be slightly different.
The Texture Crew
Eggs act as the glue that binds the flour and panko together. They also give the coating a golden sheen when baked. Two large eggs provide just enough moisture to keep the crust crisp while preventing the chicken from drying out. If you’re vegan, a plant‑based egg replacer can substitute, though the browning may be less pronounced.
Panko breadcrumbs are the star of the show. Their airy structure creates a light, crunchy exterior that is far less dense than traditional breadcrumbs. The result is a crisp that doesn’t feel heavy on the palate, allowing the tender chicken to shine. For a more exotic twist, try adding a handful of toasted sesame seeds to the panko mixture.
The Unexpected Star
Olive oil spray is the secret weapon for achieving that perfect, even golden crust. A light mist coats the cutlets, helping the panko adhere while keeping the dish lower in fat than deep frying. Spray just before baking to prevent the breadcrumbs from absorbing too much oil and becoming soggy. If you don’t have a spray bottle, a quick drizzle works too—just be mindful of the amount.
Everything's prepped? Good. Let's get into the real action...
The Method — Step by Step
- Begin by preheating your oven to 400°F (200°C). While the oven warms, lay out a parchment‑lined baking sheet and set a small bowl of flour, another bowl of beaten eggs, and a third bowl of panko breadcrumbs in front of you. This triad will make the coating process a breeze and keep the kitchen organized.
- Pat the chicken breasts dry with paper towels; this step is crucial because moisture is the enemy of crispness. Slice each breast into 1‑inch thick cutlets, then season both sides lightly with half a teaspoon of kosher salt. The salt will help the flour adhere and boost flavor without overpowering the dish.
- Dredge each cutlet first in flour, shaking off excess. Then dip it into the beaten eggs, allowing any excess to drip back into the bowl. Finally, coat it in panko, pressing lightly so the crumbs cling firmly. This three‑step coating ensures a uniform, crunchy exterior.
- Once all cutlets are coated, place them on the prepared baking sheet with a slight gap between each piece. Lightly mist the tops with olive oil spray; this will help the crust brown evenly and give a subtle sheen. The spray should be thin—just enough to coat the surface without drowning the breadcrumbs.
- Slide the sheet into the preheated oven and bake for 12 minutes. After the initial baking period, flip each cutlet carefully with tongs and bake for an additional 8 minutes or until the crust is golden brown and the internal temperature reaches 165°F (74°C). The smell of toasted panko will fill the kitchen like a warm hug.
- When the cutlets are done, remove them from the oven and let them rest for two minutes on a wire rack. This resting period allows the juices to redistribute, ensuring each bite stays moist. The crust will firm up slightly, adding to the satisfying crunch.
- Serve immediately with your favorite dipping sauce—honey mustard, garlic aioli, or a squeeze of fresh lemon juice. Garnish with chopped parsley or a sprinkle of grated Parmesan for an extra touch of elegance. The dish is ready to impress.
- That’s it—you did it. But hold on, I've got a few more tricks that'll take this to another level. The next section will reveal insider techniques that elevate the flavor and texture even further.
Insider Tricks for Flawless Results
The Temperature Rule Nobody Follows
Many cooks think any oven temperature will do, but 400°F is the sweet spot for golden crusts. Baking at a slightly lower temperature can cause the panko to brown unevenly, while higher temperatures risk drying out the chicken. Keep the oven rack centered to ensure even heat distribution. A preheated baking sheet also helps the cutlets start crisping immediately.
Why Your Nose Knows Best
The aroma that fills the kitchen before the cutlets finish baking is your best indicator of doneness. A faint, nutty scent means the panko is toasted, while a stronger, almost burnt smell signals you’re close to over‑browning. Trust your senses; they’re more reliable than a timer for achieving that perfect crust.
The 5‑Minute Rest That Changes Everything
Resting the cutlets for a few minutes after baking allows the juices to redistribute. This small step keeps the meat juicy and prevents the crust from becoming hard when you bite. It also gives the flavors time to settle, making each bite more harmonious. Skipping this rest can leave the chicken slightly dry.
Use a Baking Rack for Even Crust
Placing a wire rack on the baking sheet lifts the cutlets slightly, allowing air to circulate around them. This ensures the bottom of each cutlet also gets crispy, not just the top. It’s a simple trick that saves you from soggy bottoms and makes the dish look more professional.
Season the Panko for Extra Depth
Adding a pinch of dried herbs—such as thyme or oregano—to the panko before coating infuses the crust with subtle herbal notes. This small adjustment can transform the dish from ordinary to extraordinary. It’s a quick way to customize the flavor profile to match your meal.
Keep the Oven Door Closed
Opening the oven door frequently can cause the temperature to drop, leading to uneven cooking. Keep the door closed during the baking process, and open it only once to check the crust. This helps maintain consistent heat and ensures a uniform golden finish.
Creative Twists and Variations
This recipe is a playground. Here are some of my favorite ways to switch things up:
Herb‑Infused Cutlets
Swap the plain panko for a blend of breadcrumbs and finely chopped fresh herbs—rosemary, thyme, and basil. The aromatic herbs give the crust a fragrant kick that pairs beautifully with a lemon butter sauce. Friends who love herbaceous flavors will love this variation.
Spicy Cajun Crust
Introduce a tablespoon of Cajun seasoning into the flour before coating. The smoky heat of the spices creates a bold flavor profile that complements the mildness of the chicken. Serve with a cool yogurt dip to balance the heat.
Cheesy Parmesan Crunch
Stir a handful of grated Parmesan into the panko for a nutty, savory crust. The cheese melts into the breadcrumbs, creating a golden, cheesy layer that’s irresistible. Pair with a garlic aioli for an indulgent twist.
Asian‑Inspired Sesame Crust
Add toasted sesame seeds to the panko mixture and drizzle a splash of soy sauce over the coated cutlets before baking. The sesame seeds add a nutty flavor while the soy sauce deepens the umami. A squeeze of lime after baking gives a bright, refreshing finish.
Sweet & Smoky BBQ Finish
After baking, brush the cutlets with your favorite BBQ sauce and return them to the oven for an extra 2 minutes. The sauce caramelizes, creating a sticky, sweet glaze that balances the savory crust. This variation is perfect for summer cookouts.
Vegan Alternative
Replace the chicken with thick slices of portobello mushroom or eggplant. Use a plant‑based egg replacer and a gluten‑free flour blend. The result is a hearty, flavorful dish that satisfies both vegans and meat‑eaters alike.
Storing and Bringing It Back to Life
Fridge Storage
Cool the cutlets completely before placing them in an airtight container. Store them in the refrigerator for up to 3 days. When ready to serve, reheat in a 350°F oven for 10 minutes to restore crispness.
Freezer Friendly
Wrap each cutlet individually in parchment paper and place them in a freezer bag. They can be frozen for up to 2 months. Thaw overnight in the refrigerator, then bake at 375°F for 15 minutes to revive the crunch.
Best Reheating Method
Reheat the cutlets in a skillet over medium heat, brushing a light layer of olive oil. This method quickly restores the crispy exterior while keeping the interior moist. Add a splash of water and cover for 1 minute to create steam, then finish with a quick pan‑fry for extra crispness.