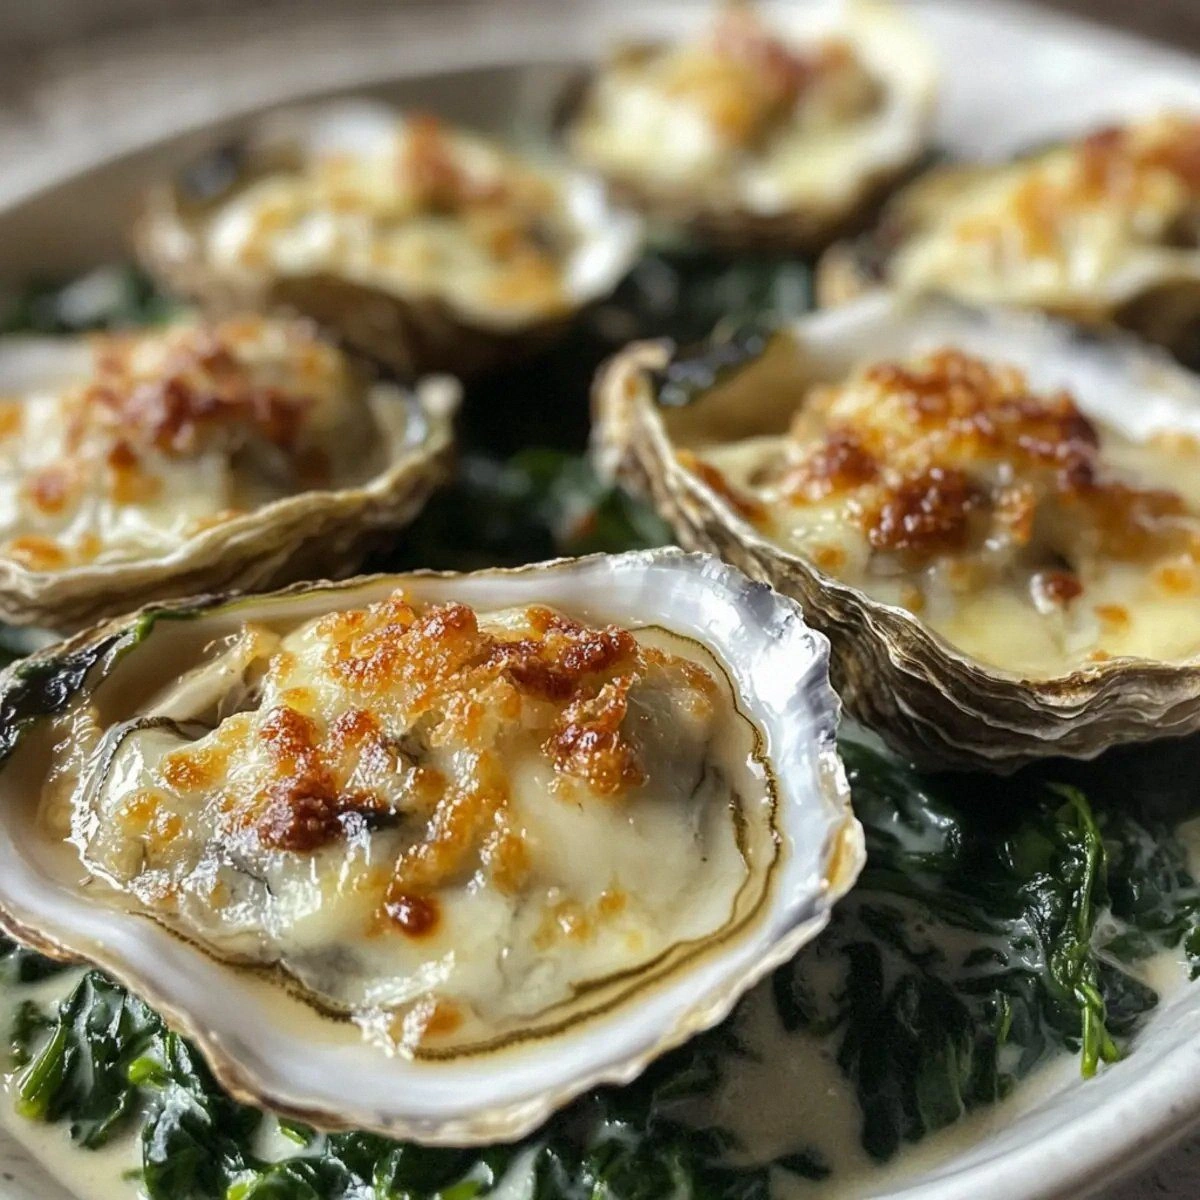
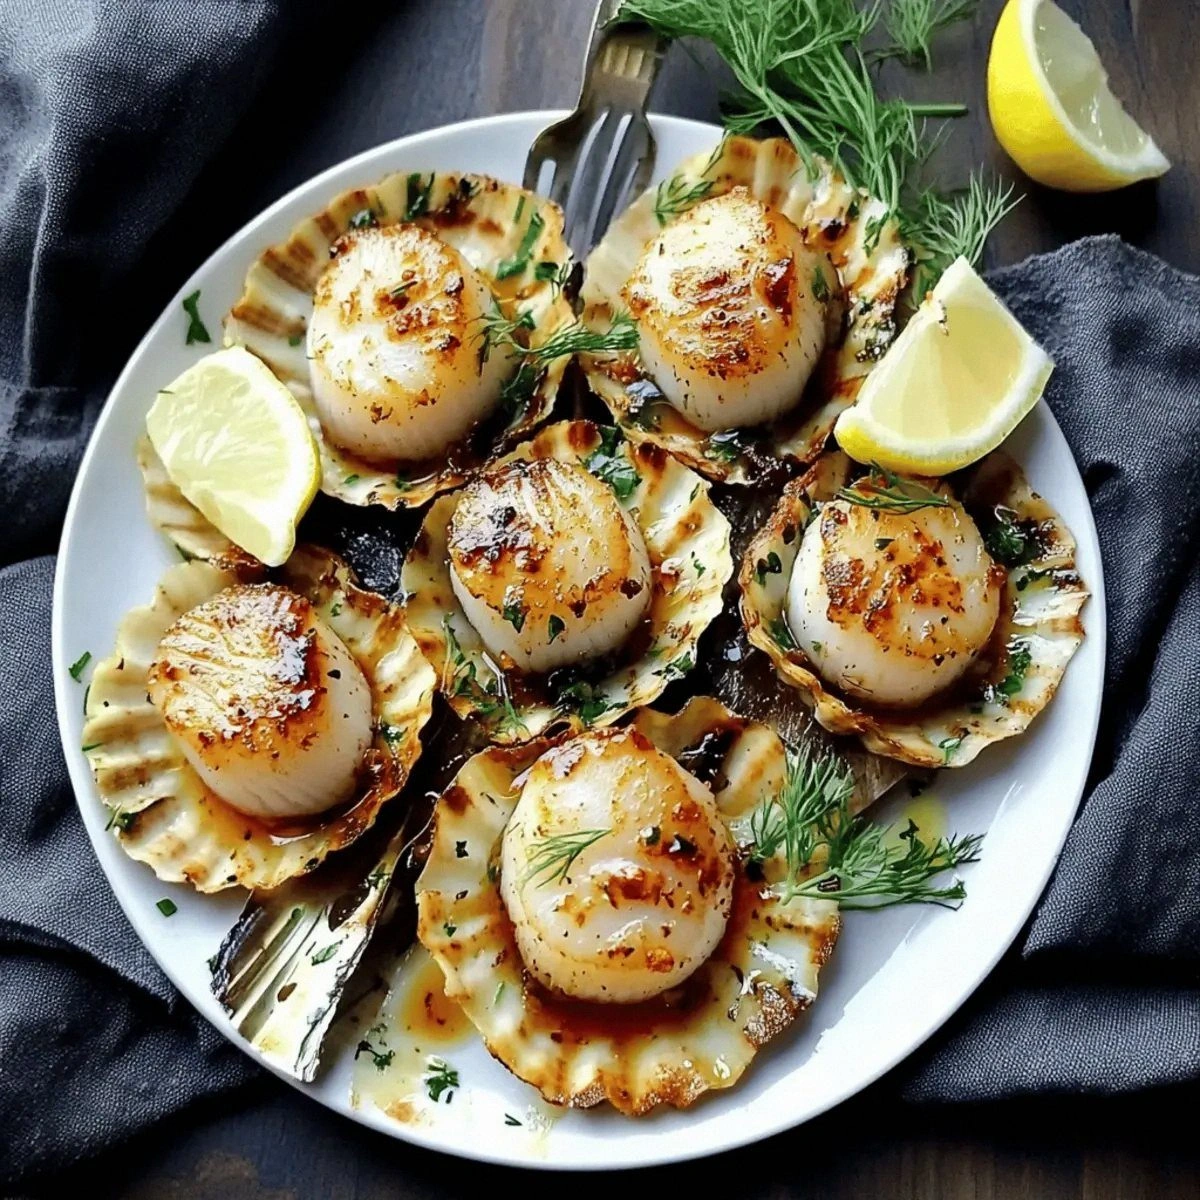
I’ll be honest — I ate half the batch before anyone else got to try it. It all started on a rainy Tuesday when my oven decided to act like a temperamental teenager, refusing to stay at the right temperature while I was trying to perfect a simple seafood dish. I was craving something that felt both luxurious and comforting, and the pantry only offered a lonely bag of frozen scallops and a bottle of olive oil that had been sitting untouched for months. After a frantic Google search and a few desperate YouTube videos, I realized most recipes either over‑cook the scallops or drown them in butter, leaving a soggy mess that no one wants to see on a plate. That night I dared myself to create a version that would make even the most skeptical seafood skeptic sit up and say, “I dare you to taste this and not go back for seconds.”
Picture yourself pulling this out of the oven, the whole kitchen smelling incredible, the buttery‑gold edges of the scallops glistening under a glossy veil of garlic‑chili oil. The first bite hits you with a buttery richness that’s instantly balanced by a bright lemon zing and a whisper of fresh dill, while the subtle heat from the red pepper flakes dances on the tongue like a gentle summer breeze. The texture? Imagine a caramelized crust that cracks like thin ice, giving way to a tender, melt‑in‑your‑mouth interior that practically sings “sea” with every chew. Most recipes get this completely wrong, either searing the scallops too long or under‑seasoning them, but this method locks in flavor and moisture with a precise bake‑and‑broil combo that’s pure magic.
What makes this version truly stand out is a secret weapon: a quick‑made garlic chili oil that you drizzle over the scallops just before they finish cooking, allowing the oil to soak into the delicate flesh without overwhelming it. The oil is infused with crushed garlic, red pepper flakes, and a splash of lemon juice, creating a glossy, aromatic glaze that coats each scallop like a silk shawl. I’ve tried countless variations, but none have delivered that perfect balance of heat, acidity, and herbaceous freshness while keeping the scallops juicy. And the best part? The whole process is simple enough for a weeknight dinner yet impressive enough to wow guests at a dinner party.
Okay, ready for the game‑changer? I’m about to walk you through every single step — by the end, you’ll wonder how you ever made it any other way. Stay with me here — this is worth it. Let’s dive in, and remember, I dare you to taste this and not go back for seconds.
What Makes This Version Stand Out
- Flavor Explosion: The garlic‑chili oil delivers a layered taste profile that starts with a buttery base, builds with aromatic garlic, spikes with red pepper heat, and finishes with bright lemon and dill. Each bite feels like a mini celebration in your mouth.
- Texture Perfection: By baking at a moderate temperature then finishing under the broiler, the scallops develop a caramelized crust that cracks like thin ice while the interior stays silky and tender.
- Simplicity: Only eight ingredients, minimal prep, and a single pan make this dish both approachable for beginners and efficient for seasoned cooks.
- Ingredient Quality: Using jumbo sea scallops ensures a meaty bite, and fresh dill adds a herbaceous lift that dried herbs simply can’t match.
- Crowd Reaction: Guests often claim this is the best seafood they’ve ever tasted, and the dish frequently becomes the centerpiece of conversation at dinner tables.
- Cooking Method: The bake‑then‑broil technique locks in moisture while creating a caramelized exterior, a method many overlook in favor of pan‑searing alone.
- Make‑Ahead Potential: The oil can be prepared hours in advance, allowing you to focus on perfect timing when the scallops hit the oven.
- Versatility: Pair it with a simple salad, risotto, or even a buttery pasta — the flavors adapt beautifully to many accompaniments.
Inside the Ingredient List
The Flavor Base
The heart of this dish is the garlic‑chili oil, a simple mixture of olive oil, minced garlic, and red pepper flakes. Olive oil provides a smooth, buttery carrier that lets the garlic and heat permeate the scallops without overwhelming them. If you skip the oil, you lose the glossy finish and the subtle richness that makes each bite feel luxurious. As a swap, you can use grapeseed oil for a lighter flavor, but the extra fruitiness of olive oil is what makes the sauce sing.
The Texture Crew
Jumbo sea scallops are the star here; their size ensures a meaty bite and a firm yet tender texture when cooked correctly. When buying, look for scallops that are dry (not soaked in water) and have a slightly sweet sea scent. If you can’t find jumbo scallops, opt for the largest you can locate, but reduce the cooking time by a minute or two to avoid overcooking. Salt and pepper are the classic duo that enhances the natural sweetness of the scallops, and a light dusting is all you need.
The Unexpected Star
Fresh dill might seem like a garnish, but its bright, grassy notes cut through the richness of the oil and add a refreshing finish. A common mistake is to add dried dill, which can taste bitter and lose its aromatic punch. If dill isn’t your thing, try flat‑leaf parsley or a sprinkle of chives for a similar fresh lift. The lemon, used both as juice and zest, provides acidity that balances the oil and brings a sunny brightness to the plate.
The Final Flourish
A whole lemon isn’t just for squeezing; zesting the lemon before juicing releases essential oils that intensify the citrus aroma. When zesting, use a microplane and avoid the white pith, which can introduce bitterness. This final touch adds a fragrant lift that makes the dish feel lighter and more refined. If you prefer a milder citrus note, use half a lemon instead of a whole, but don’t skimp on the zest.
Everything's prepped? Good. Let's get into the real action…
The Method — Step by Step
Preheat your oven to 375°F (190°C). While the oven warms, line a large baking sheet with parchment paper and set a wire rack on top; this ensures even airflow and prevents the scallops from steaming in their own juices. The heat should feel like a warm hug, not an aggressive blast — this moderate temperature is crucial for cooking the scallops through without drying them out. If you’re using a convection oven, you can reduce the temperature by 25°F.
Pat the scallops dry with paper towels, then season both sides lightly with salt and pepper. This is the moment where you’ll hear the faint “sizzle” of anticipation, even before they hit the heat. Remember, a dry surface is the secret to a caramelized crust; any lingering moisture will steam them instead. Let them sit for two minutes; this short rest lets the seasoning penetrate.
Arrange the scallops on the wire rack, leaving a little space between each piece. Drizzle the olive oil evenly over the top, using a pastry brush to coat each scallop with a thin sheen. Okay, ready for the game‑changer? This oil layer acts like a conductor, guiding the heat into the scallops while keeping them moist.
Slide the sheet into the oven and bake for 12‑14 minutes, or until the scallops turn opaque and the edges begin to turn a light golden hue. The aroma at this point should be a gentle sea‑kiss with a hint of olive, signaling you’re on the right track. Resist the urge to open the oven door too often; each opening drops the temperature and can affect the crust formation.
Watch Out: Over‑baking is the most common pitfall. If the scallops turn rubbery, they’ve crossed the line. Aim for an internal temperature of 125°F (52°C) — they’ll finish cooking during the broil phase.
While the scallops bake, prepare the garlic‑chili oil. In a small saucepan over low heat, combine the olive oil, minced garlic, and red pepper flakes. Let them gently warm for 3‑4 minutes, stirring occasionally, until the garlic turns fragrant but not brown. Finish by whisking in the lemon juice and zest, then stir in the fresh dill just before removing from heat.
When the bake time is up, pull the tray out and immediately drizzle the warm garlic‑chili oil over each scallop, ensuring an even coat. Then, switch the oven to broil and place the tray on the top rack. Broil for 2‑3 minutes, watching closely; you want the edges to blister and turn a deep amber, almost caramelized, without burning.
Remove the scallops from the oven and let them rest for a minute. This short rest allows the juices to redistribute, ensuring each bite is juicy rather than dry. Finish with an extra squeeze of lemon and a sprinkle of fresh dill for a final burst of brightness. Serve immediately on a warmed platter, and watch as your guests’ eyes widen with anticipation.
That’s it — you did it. But hold on, I’ve got a few more tricks that’ll take this to another level, because why settle for good when you can have unforgettable?
Insider Tricks for Flawless Results
The Temperature Rule Nobody Follows
Most home cooks rely on “cook until opaque,” which is vague and can lead to overcooking. Instead, use a quick‑read instant‑read thermometer and pull the scallops at 125°F (52°C); they’ll finish cooking during the broil phase and stay buttery. I once served scallops that were a shade too firm, and the guest politely mentioned they felt “chewy.” That experience taught me that a precise temperature is the secret to that melt‑in‑your‑mouth texture.
Why Your Nose Knows Best
Your sense of smell is a far more reliable indicator than a timer when it comes to the final broil. When the edges start to release a caramelized, nutty scent, you’re on the cusp of perfection. If you’re unsure, take a quick peek; the edges should be a deep amber, not black. Trust that nose; it’s the culinary equivalent of a radar for flavor.
The 5‑Minute Rest That Changes Everything
After broiling, let the scallops sit for exactly five minutes. This pause lets the interior fibers relax and the surface glaze settle, preventing the juices from spilling out when you cut into them. Skipping this step is like cutting into a fresh loaf of bread too soon — you lose that soft interior. The rest also allows the dill to release its essential oils, deepening the herbaceous note.
Oil Temperature Mastery
When you heat the garlic‑chili oil, keep it below 300°F (150°C). Overheating destroys the delicate garlic flavor and can make the oil taste bitter. A good trick is to dip a wooden spoon into the oil; if you see tiny bubbles forming around the spoon, you’re in the sweet spot.
Seasoning Layers for Depth
Season the scallops twice: once before baking and again after drizzling the oil. The first seasoning builds a base, while the second adds a finishing lift that brightens the dish. If you forget the second sprinkle, the final bite can feel flat, missing that subtle pop of salt that enhances the sweetness.
Creative Twists and Variations
This recipe is a playground. Here are some of my favorite ways to switch things up:
Spicy Sriracha Drizzle
Swap half of the red pepper flakes for a teaspoon of sriracha mixed into the oil. The result is a deeper, smoky heat that pairs beautifully with the lemon’s acidity. Perfect for guests who love a bold kick.
Herbaceous Basil Boost
Replace the dill with fresh basil leaves, torn just before serving. Basil adds a sweet, peppery nuance that turns the dish into a Mediterranean‑inspired delight. Great when served alongside a tomato‑cucumber salad.
Coconut‑Infused Oil
Use half coconut oil and half olive oil for the garlic‑chili mixture. The subtle coconut aroma adds a tropical twist, especially lovely when paired with a mango salsa on the side.
Umami Boost with Soy
Add a splash of low‑sodium soy sauce to the oil before whisking in the lemon. The umami depth elevates the scallops, making them taste almost like a fine sushi roll.
Garlic‑Free Garlic‑Infused Oil
For garlic‑allergy sufferers, substitute the fresh garlic with a teaspoon of garlic‑infused oil. You retain the aromatic backbone without the actual cloves, keeping the dish safe and still flavorful.
Storing and Bringing It Back to Life
Fridge Storage
Place cooled scallops in an airtight container, drizzle a thin layer of the leftover garlic‑chili oil over them, and store in the refrigerator for up to 2 days. The oil acts as a barrier, preventing the scallops from drying out.
Freezer Friendly
For longer storage, flash‑freeze the scallops on a baking sheet, then transfer to a zip‑top freezer bag. They keep for up to 3 months. When you’re ready to use them, thaw overnight in the fridge and give them a quick re‑heat under the broiler with fresh oil.
Best Reheating Method
Reheat gently in a pre‑heated 300°F (150°C) oven for 5‑7 minutes, adding a tiny splash of water or extra oil to create steam and revive the glossy finish. Avoid microwaving; it turns the delicate texture rubbery. A quick broil for 1 minute at the end will restore that caramelized edge.