Picture this: a rainy afternoon, a kitchen that smells like burnt sugar, and a stubborn craving for something sweet that feels like a hug in a bowl. I was staring at a box of stale cake mix, the kind that turns your face into a sad, slightly burnt orange. I was about to toss it in the trash when a friend texted, “I’ve got the ultimate Japanese cheesecake recipe—trust me.” I laughed, then decided to test it. The moment the batter hit the oven, the air filled with a buttery, slightly sweet aroma that made my eyes water in the best way possible. That’s the kind of sensory storm that turns a kitchen disaster into a culinary triumph.
Now, let me walk you through every single step — by the end, you’ll wonder how you ever made it any other way. This isn’t just another fluffy cake; it’s a cloud of flavor that defies the typical dense, heavy cheesecake. The secret? A delicate balance of ingredients, a meticulous folding technique, and an oven that’s more like a gentle caress than a roaring furnace. I dare you to taste this and not go back for seconds. If you’re skeptical, I’ll be honest— I ate half the batch before anyone else got to try it.
What sets this version apart is not just the airy texture but the way each element sings in harmony. Most recipes get this completely wrong by overmixing or using the wrong temperature. Here, we’ll keep the batter light, the edges crisp, and the center moist like a cloud you can bite into. Picture yourself pulling this out of the oven, the whole kitchen smelling incredible, and a slice that melts on your tongue like velvet. The result is a dessert that feels like a celebration in every bite. This is hands down the best version you'll ever make at home.
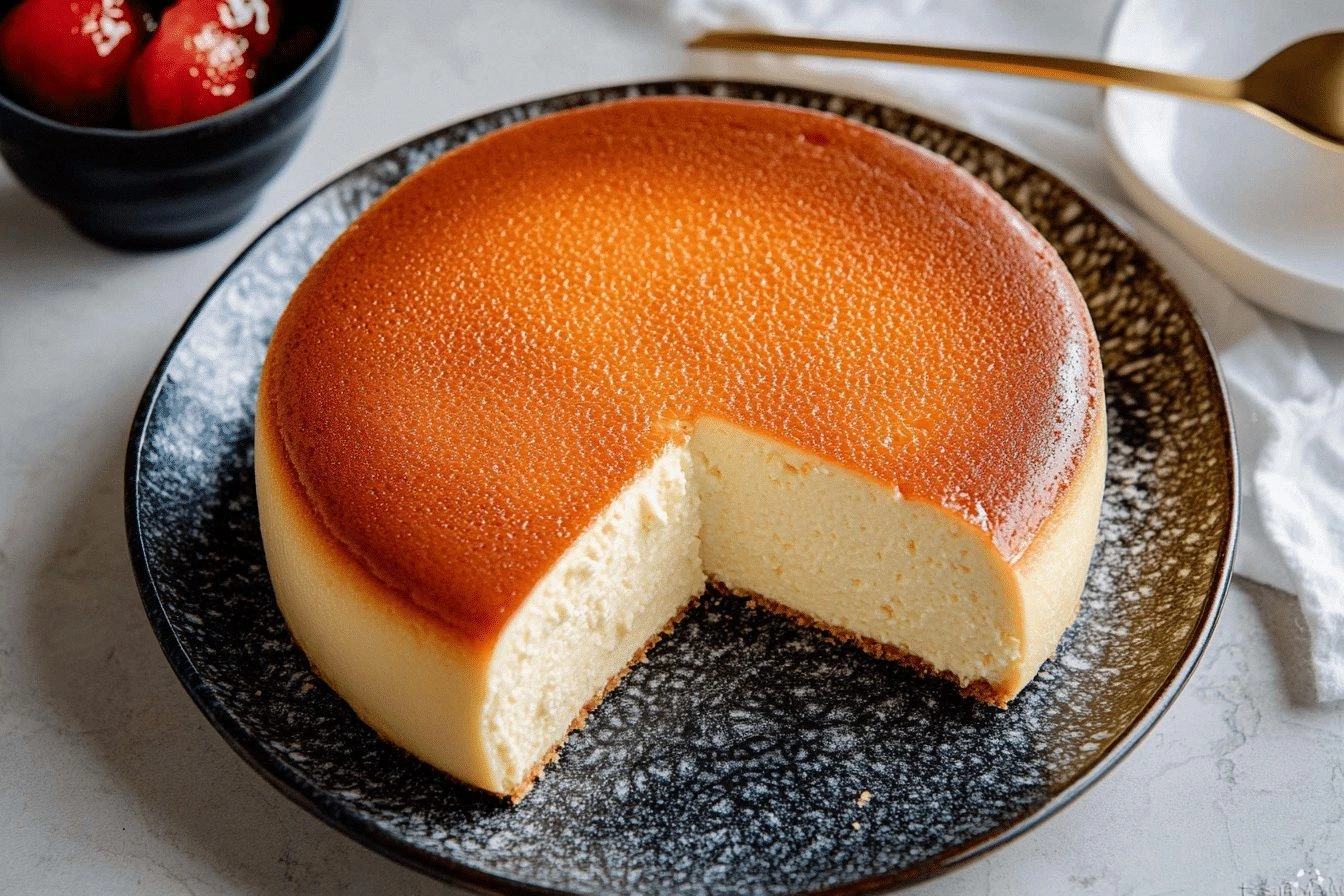
And I promise you, the technique that makes all the difference is simple, yet so effective that even a novice can master it. The method involves whisking, folding, and a low-temperature bake that keeps the cake from collapsing. The result? A perfectly risen, golden‑brown top with a tender, custard‑like interior that’s a revelation. I’ll guide you through every nuance, from the first whisk to the final dusting of powdered sugar. Stay with me here— this is worth it.
What Makes This Version Stand Out
- Lightness: The batter is folded, not beaten, creating tiny air pockets that give the cake its signature cloud‑like texture.
- Flavor Balance: Cream cheese provides richness, while a splash of lemon zest and vanilla keep the sweetness in check.
- Low‑Heat Baking: Cooking at 150 °C (300 °F) prevents the cake from cracking and ensures an even rise.
- Texture Contrast: The golden top is slightly crisp, while the inside remains silky and custardy.
- Versatility: It can be served plain, topped with fresh berries, or even folded into a parfait.
- Make‑Ahead Friendly: Chill the batter, bake, then refrigerate; it tastes even better the next day.
- Minimal Equipment: Requires only a mixing bowl, whisk, and a standard oven—no fancy gadgets.
- Crowd Reaction: Guests often ask for the recipe after the first bite; it’s a conversation starter.
Alright, let's break down exactly what goes into this masterpiece…
Inside the Ingredient List
The Creamy Core
Cream cheese is the star that gives this cheesecake its signature richness. Use a full‑fat variety for the best mouthfeel; low‑fat versions will make the cake dry. If you’re in a pinch, Greek yogurt can substitute, but it will alter the flavor slightly. A small amount of lemon zest adds a bright counterpoint that keeps the sweetness from becoming cloying.
The Sugar and Egg Alliance
Granulated sugar is essential for sweetness and structure. It dissolves into the batter, creating a smooth base. Eggs provide the protein matrix that holds the cake together; using large eggs ensures the right ratio of yolk to white for stability. Skipping eggs will compromise the rise and texture.
The Flour and Cornstarch Duo
All‑purpose flour adds subtle structure without making the cake dense. Cornstarch, on the other hand, keeps the batter silky and prevents it from becoming gritty. Together, they create a fine crumb that’s light as a feather. If you’re gluten‑free, try a blend of rice flour and tapioca starch.
The Flavor Enhancers
Vanilla extract infuses the batter with warmth and depth. A pinch of baking powder ensures a gentle lift, while a pinch of salt balances the sweetness. Butter, melted and cooled, adds richness and helps the batter stay cohesive. Don’t forget the lemon zest— it’s the secret that elevates the entire flavor profile.
Everything's prepped? Good. Let's get into the real action…
The Method — Step by Step
- Preheat your oven to 150 °C (300 °F). Line a 20 cm (8‑inch) round cake pan with parchment and lightly grease the sides. This low‑heat approach prevents the cake from cracking and keeps it moist.
- In a heat‑proof bowl, combine cream cheese, sugar, and a splash of milk. Warm the mixture gently over a pot of simmering water, stirring until it’s silky smooth. This step melts the cheese evenly and prevents lumps.
- Separate the eggs. Beat the whites to soft peaks, then fold them into the cheese mixture in two batches. Be careful not to over‑whisk; you want a light, airy texture.
- Whisk the yolks with the remaining milk, vanilla, and lemon zest. Gently fold this into the batter, then add the flour, cornstarch, baking powder, and salt. The goal is a homogeneous mixture with no streaks.
- Pour the batter into the prepared pan and tap it gently on the counter to release air bubbles. The batter should sit level, not too high or too low.
- Place the pan in the oven and bake for 45 minutes. The top will develop a light golden crust, and the center will set but still have a slight wobble— that’s the cue that it’s done.
- Turn off the oven, leave the door slightly ajar, and let the cake cool in the oven for 30 minutes. This gradual cooling prevents the cake from cracking.
- After 30 minutes, remove the cake, let it cool completely on a wire rack, then refrigerate for at least 4 hours—or overnight for best flavor. The chill enhances the cake’s airy texture.
That's it — you did it. But hold on, I've got a few more tricks that'll take this to another level…
Insider Tricks for Flawless Results
The Temperature Rule Nobody Follows
Many bakers use high heat to speed up baking, but this recipe thrives on patience. Baking at 150 °C ensures even heat distribution, preventing the outer edges from overcooking while the center stays custard‑like. I once tried 200 °C and the cake cracked like a brittle cookie. Stick to the low temperature and trust the process.
Why Your Nose Knows Best
When the cake is done, it should emit a warm, buttery scent with a hint of vanilla and lemon. If you smell nothing, the cake is undercooked; if you smell burnt sugar, it’s overcooked. Your nose is a reliable judge of doneness— trust it.
The 5‑Minute Rest That Changes Everything
After removing the cake from the oven, let it sit in the oven with the door ajar for 5 minutes. This gentle cooling period allows the steam to dissipate slowly, keeping the cake from cracking. I’ve seen this trick save a cake from a disappointing finish.
The Gentle Whisk
Whisk the batter just until smooth, then switch to folding. Over‑whisking incorporates too much air, which can cause the cake to rise too quickly and then collapse. Folding keeps the batter light yet stable.
The Chill Factor
Refrigerating the batter before baking is optional, but it helps the cake set more evenly. If you’re short on time, skip it— the result will still be excellent, just slightly less airy.
The Dusting Trick
Just before serving, dust the top with powdered sugar. It adds a sweet finish and a subtle crunch that contrasts the silky interior. I like to swirl a little vanilla bean powder for an extra aromatic touch.
Creative Twists and Variations
This recipe is a playground. Here are some of my favorite ways to switch things up:
Berry Burst
Swirl fresh blueberries or raspberries into the batter before baking. The berries burst with flavor, adding a fruity pop that pairs wonderfully with the creamy base.
Matcha Magic
Fold in 1–2 teaspoons of matcha powder for a subtle earthy green tea flavor. It’s a beautiful color contrast and adds a unique twist for tea lovers.
Chocolate Drizzle
Drizzle melted dark chocolate over the cooled cake. The bittersweet chocolate balances the sweetness and gives the dessert a decadent finish.
Citrus Zest Swap
Replace lemon zest with orange or yuzu zest for a bright, citrusy note. The citrus oils elevate the flavor profile and add a fragrant aroma.
Almond Crunch
Top the finished cake with toasted sliced almonds. The crunch provides a delightful contrast to the silky interior.
Espresso Infusion
Add a tablespoon of instant espresso powder to the batter. The espresso deepens the flavor and creates a subtle coffee undertone that pairs beautifully with the cream cheese.
Storing and Bringing It Back to Life
Fridge Storage
Wrap the cake tightly in plastic wrap and store in the refrigerator for up to 5 days. The cake stays moist and airy, thanks to the low‑fat environment that prevents drying.
Freezer Friendly
For longer storage, freeze the cake in a freezer‑safe container for up to 2 months. Thaw in the refrigerator overnight before serving. The texture remains almost as good as fresh.
Best Reheating Method
To revive a chilled cake, place it in a preheated oven at 120 °C (250 °F) for 10 minutes. Add a tiny splash of water to the pan before baking; the steam will help the cake re‑moisturize and regain its airy feel.