I was standing in my kitchen, half‑asleep, when a friend dared me to bring “the sin” to our upcoming birthday bash. I laughed, grabbed a bag of marshmallows, and thought, “What could possibly go wrong?” The next morning the smell of melted butter and cocoa hit me like a warm hug, and I realized I was about to create a cake that would make even the most disciplined dessert‑eaters question their life choices. I swear, the first bite was so decadent that I almost called off the party just to finish the rest myself.
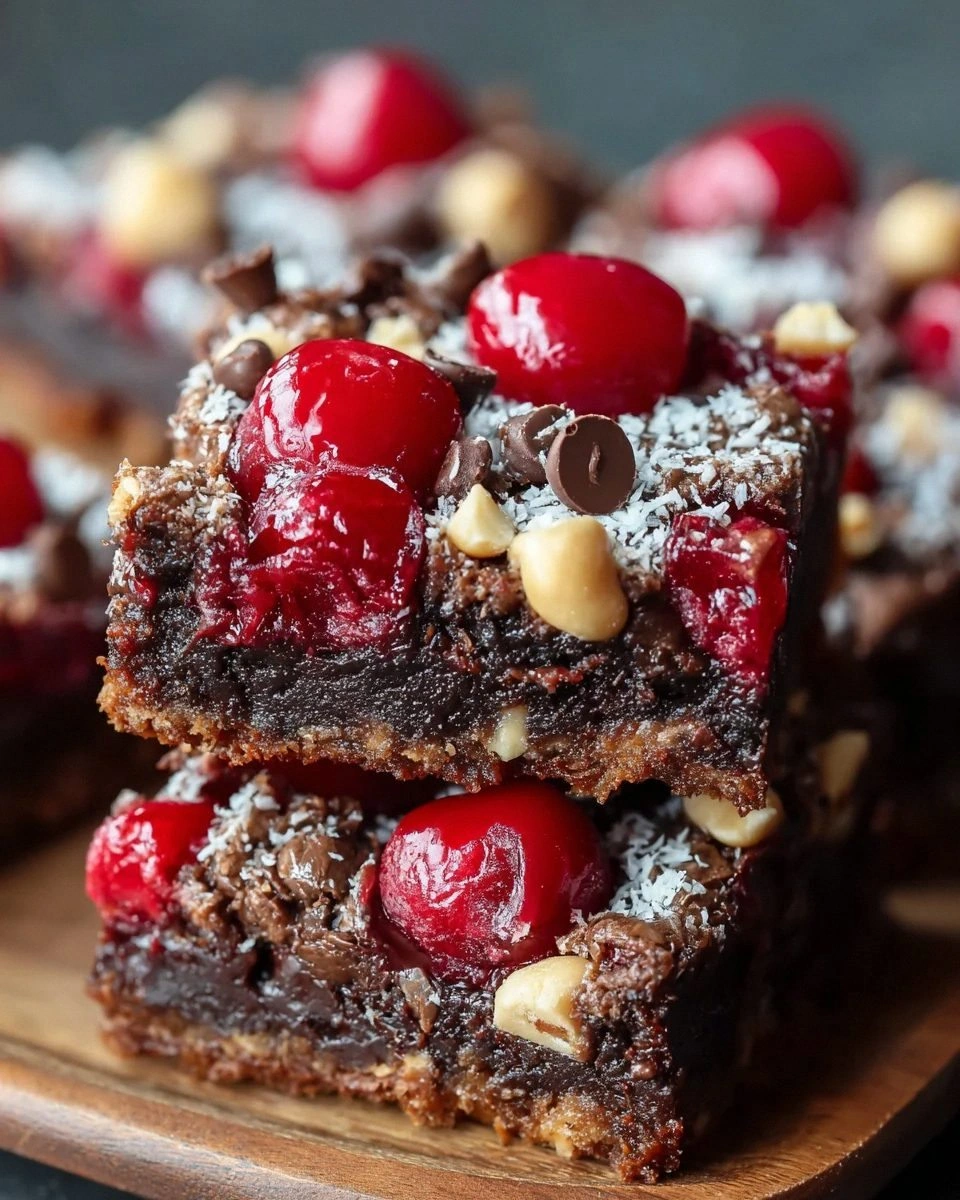
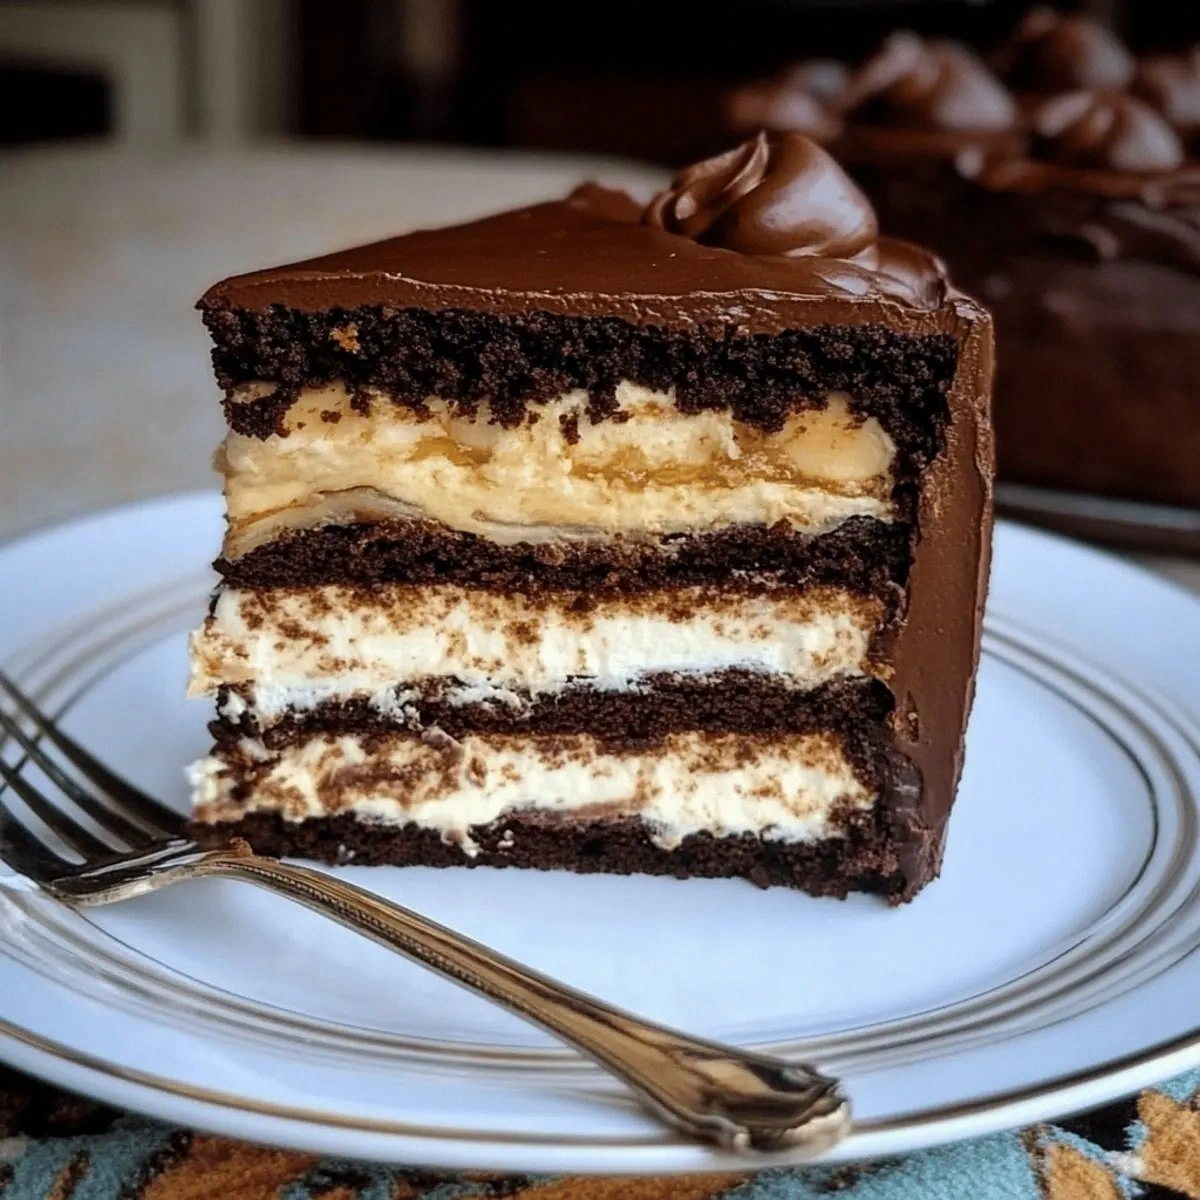
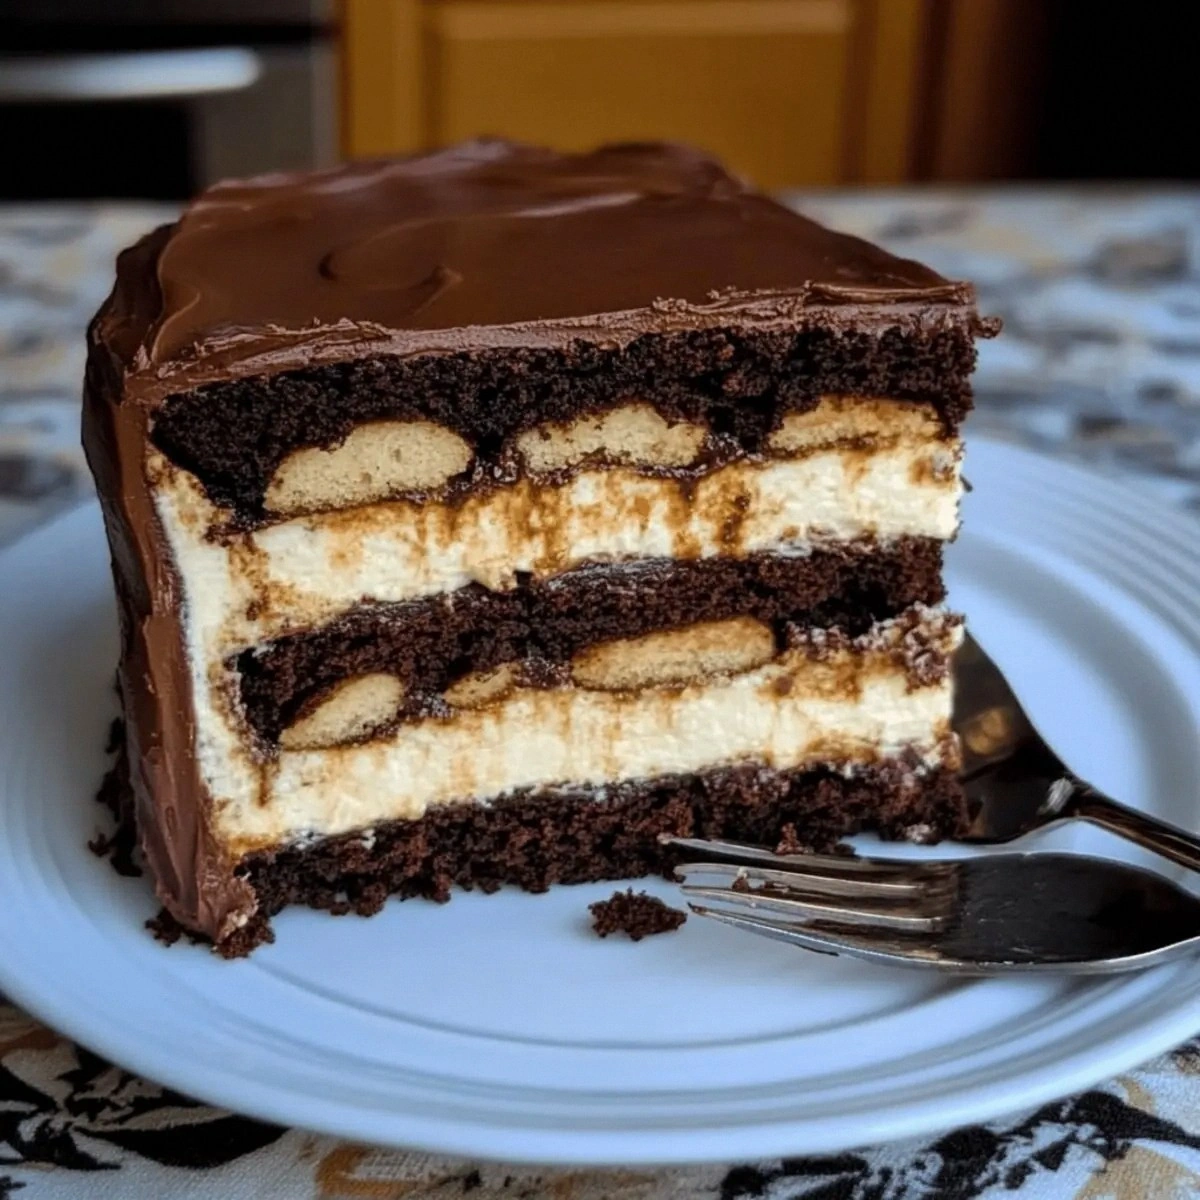
Picture this: a towering, seven‑layer masterpiece that looks like a chocolate‑covered skyscraper, each tier whispering promises of gooey marshmallow, creamy cheesecake, and a buttery crumb that crumbles like fresh‑baked snow. The kitchen was alive with the sizzle of butter hitting the pan, the low hum of the oven, and the occasional giggle from my cat who seemed to think the batter was a new kind of catnip. My hands were covered in cocoa dust, and the air tasted like a blend of a candy store and a bakery on a Saturday morning.
Most “seven‑layer” cakes out there are either a confusing mess of flavors or a tedious, time‑sucking project that leaves you wondering if the effort was worth it. This version, however, is a symphony of textures that plays together without stepping on each other’s toes. The secret? A layer of marshmallow fluff that melts into a silky glaze, a cheesecake filling that’s as smooth as silk, and a cookie‑dough crumble that adds a playful crunch. I dare you to taste this and not go back for seconds.
And now the fun part: I’m about to reveal a technique that most bakers completely overlook—a quick butter‑cream glaze that sets in minutes, giving you that glossy finish without the dreaded “crack‑on‑cooling” disaster. Okay, ready for the game‑changer? Let me walk you through every single step — by the end, you’ll wonder how you ever made it any other way.
What Makes This Version Stand Out
- Flavor Explosion: Every bite delivers a cascade of chocolate, caramel, and buttery notes that linger on the palate like a sweet after‑glow.
- Texture Harmony: From the crisp graham‑cracker crust to the cloud‑like cheesecake, each layer offers a distinct mouthfeel that keeps you intrigued.
- Simplicity Meets Sophistication: Though it looks like a professional patisserie creation, the steps use everyday pantry staples and require no fancy equipment.
- Unique Ingredient Pairing: Marshmallow fluff meets chocolate chip cookie dough—a pairing most recipes miss, but it’s pure magic here.
- Crowd Reaction: Expect gasps, applause, and an inevitable “Can I have the recipe?” after the first slice is served.
- Ingredient Quality: Using full‑fat cream cheese and premium semi‑sweet chocolate chips creates a richness that cheap substitutes can’t match.
- Make‑Ahead Friendly: Assemble the layers a day ahead, refrigerate, and the flavors meld even more, making your celebration stress‑free.
Inside the Ingredient List
The Flavor Base
The backbone of this cake is the classic butter‑sugar‑egg combination. 1 cup Unsalted Butter provides richness and a tender crumb; make sure it’s softened to room temperature so it incorporates smoothly. 1 cup Granulated Sugar and 1/2 cup Brown Sugar work together to give a balanced sweetness with a subtle caramel undertone. Skipping the brown sugar would strip away that deep molasses flavor, leaving the cake flat. If you’re watching sugar, you can replace half the granulated sugar with coconut sugar, but expect a slight coconut note.
4 large Eggs act as the structural glue, trapping air for a light crumb. Over‑beating can cause a dense texture, so beat just until pale and fluffy. 1 cup All-Purpose Flour is the neutral canvas; using cake flour would make the cake overly tender, while bread flour would make it tough. 1/2 cup Cocoa Powder gives that deep chocolate hue and a bitter edge that balances the sugars. Opt for Dutch‑process cocoa for a smoother taste.
The Texture Crew
1 teaspoon Vanilla Extract adds aromatic depth—don’t skimp, a good vanilla bean or pure extract makes a world of difference. The 16 ounces Full‑Fat Cream Cheese creates the velvety cheesecake layer; low‑fat versions will turn grainy when baked. Pair it with 1/2 cup Granulated Sugar (for the cheesecake) to sweeten without overwhelming. 2 large Eggs in the cheesecake provide lift and a silk‑like consistency.
1/2 cup Sour Cream introduces a tang that cuts through the richness, preventing the filling from feeling cloying. If you’re out of sour cream, Greek yogurt works as a 1‑to‑1 swap, adding a slight tang and extra protein.
The Unexpected Star
2 cups Chocolate Chip Cookie Dough is the secret weapon—its buttery, sweet chunks melt into a gooey layer that feels like a dessert within a dessert. 1 cup Semi‑Sweet Chocolate Chips amplify the chocolate intensity and create pockets of molten chocolate when the cake is warm. For a darker profile, use bittersweet chips; for a sweeter twist, milk chocolate works too.
The Final Flourish
1 cup Graham Crackers and 1/2 cup Butter form the crunchy crust that grounds the cake. Toast the crackers lightly before crushing for extra depth. 1 cup Marshmallow Fluff becomes the glossy glaze that drapes over the top, giving a glossy sheen that looks like a mirror. 1/2 cup Unsalted Butter (again) is folded into the glaze to create a glossy, buttery finish.
3 cups Powdered Sugar sweetens the glaze without gritty texture. 1/2 cup Cocoa Powder (again) deepens the color of the glaze, making it look like a midnight sky. Finally, 1/4 cup Milk adjusts the glaze’s consistency, ensuring it spreads like satin. If the glaze becomes too thick, add a splash more milk; if too thin, add a pinch more powdered sugar.
Everything's prepped? Good. Let’s get into the real action…
The Method — Step by Step
Preheat your oven to 350°F (175°C) and grease three 8‑inch round cake pans. Line the bottoms with parchment paper; this prevents the delicate layers from sticking and tearing when you flip them. When you tap the pans, you should hear a faint “ding” that tells you they’re ready for batter. Pro tip: Give each pan a light dusting of flour after greasing for an extra barrier.
In a large bowl, cream together 1 cup Unsalted Butter, 1 cup Granulated Sugar, and 1/2 cup Brown Sugar until the mixture is light golden and smells like a bakery on a Sunday morning. This should take about 3‑4 minutes on medium speed. The texture should be fluffy enough that a spoonful holds its shape without sliding off.
Add the 4 large Eggs, one at a time, beating well after each addition. The batter will thicken then smooth out—this is the moment where the cake gains its structure. Then stir in 1 teaspoon Vanilla Extract, followed by 1 cup All-Purpose Flour and 1/2 cup Cocoa Powder. Mix just until combined; over‑mixing will develop gluten and make the cake dense.
Divide the batter evenly among the three prepared pans. Using a spatula, smooth the tops so they’re level. Place the pans in the preheated oven and bake for 18‑22 minutes, or until a toothpick inserted in the center comes out with a few moist crumbs but no wet batter. The edges should start pulling away from the pan, a clear sign of doneness.
While the cakes are baking, prepare the crust. Crush 1 cup Graham Crackers into fine crumbs (a food processor works best). Melt 1/2 cup Butter and stir it into the crumbs until the mixture resembles wet sand. Press this firmly into the bottom of a 9‑inch springform pan, creating an even base. Chill the crust while the cakes finish baking.
For the cheesecake layer, beat together 16 ounces Full‑Fat Cream Cheese and 1/2 cup Granulated Sugar until smooth and free of lumps. Add 2 large Eggs one at a time, then fold in 1/2 cup Sour Cream and another 1 teaspoon Vanilla Extract. The mixture should be glossy and slightly thick.
Spread the cheesecake batter over the cooled graham‑cracker crust, smoothing the top with an offset spatula. Sprinkle 2 cups Chocolate Chip Cookie Dough over the cheesecake, pressing gently so it adheres. Then scatter 1 cup Semi‑Sweet Chocolate Chips across the surface; they’ll melt into pockets of molten chocolate as the cake bakes.
Once the cakes have cooled completely, level the tops with a serrated knife. Place the first cake layer on a serving plate, then spread a thin veil of 1 cup Marshmallow Fluff mixed with 1/2 cup Unsalted Butter and 1/4 cup Milk. This creates a glossy “glue” that holds the next layer. Repeat with the second and third cake layers, ensuring each is coated evenly.
Now for the grand finale: the chocolate glaze. In a saucepan over low heat, whisk together 3 cups Powdered Sugar, 1/2 cup Cocoa Powder, 1/2 cup Unsalted Butter, and 1/4 cup Milk until smooth and glossy. The mixture should be pourable but thick enough to coat the sides without running off. Drizzle the glaze over the top, letting it cascade down the sides like a midnight waterfall.
Refrigerate the assembled cake for at least 2 hours, preferably overnight. This allows the layers to set, the flavors to meld, and the glaze to firm up. When you finally slice, use a hot, wet knife for clean cuts—this prevents crumbs from crumbling all over the plate.
That's it — you did it. But hold on, I've got a few more tricks that'll take this to another level…
Insider Tricks for Flawless Results
The Temperature Rule Nobody Follows
Never bake a cake straight from a cold refrigerator. Let the batter sit at room temperature for 15 minutes before pouring it into the pans. This small step prevents the batter from “shocking” the oven, which can cause uneven rising. I once baked a batch that was cold and ended up with a dome that looked like a deflated balloon—lesson learned.
Why Your Nose Knows Best
Trust the aroma. When the cake reaches that sweet, buttery scent with a hint of caramel, you’re almost there. The visual cue of edges pulling away is great, but the nose is a more reliable indicator. If you’re ever in doubt, give it a gentle press; the center should spring back slowly, not snap like a rubber band.
The 5‑Minute Rest That Changes Everything
After you pull the cake out of the oven, let it rest on a wire rack for exactly five minutes before moving it to a cooling rack. This short pause lets the steam escape, preventing soggy bottoms. A friend once tried to skip this rest and ended up with a soggy crust that fell apart when she sliced—don’t be that friend.
Glaze Consistency Cheat
If your chocolate glaze thickens too quickly, whisk in a teaspoon of hot water at a time until you reach a satin‑smooth pour. Conversely, if it’s too runny, dust in a tablespoon of powdered sugar. The key is to keep the glaze glossy without it becoming a puddle.
The Slice‑And‑Serve Secret
Heat a long chef’s knife in hot water, dry it, then slice. The warm blade glides through the layers without dragging crumbs, giving you clean, picture‑perfect slices. This trick saved my presentation at a wedding where every guest was snapping photos of the cake.
Creative Twists and Variations
This recipe is a playground. Here are some of my favorite ways to switch things up:
Nutty Delight
Swap half of the graham crackers for toasted almond meal and sprinkle chopped hazelnuts into the chocolate chip cookie dough. The nutty crunch adds an earthy contrast that pairs beautifully with the marshmallow glaze.
Berry Burst
Fold a cup of fresh raspberries into the cheesecake layer and drizzle a raspberry coulis over the final glaze. The tart berries cut through the sweetness, delivering a refreshing burst with every bite.
Coffee Kick
Add a tablespoon of instant espresso powder to the cocoa powder in the cake batter and to the chocolate glaze. The subtle coffee notes deepen the chocolate flavor, making the cake feel more adult‑centric.
White Chocolate Dream
Replace the semi‑sweet chocolate chips with white chocolate chips and swap the cocoa in the glaze for melted white chocolate. The result is a lighter, buttery version that still carries the same structural integrity.
Spiced Holiday
Incorporate a teaspoon of ground cinnamon and a pinch of ground nutmeg into the cake batter, and garnish the top with crushed peppermint candies after glazing. This variation turns the cake into a festive centerpiece for winter celebrations.
Storing and Bringing It Back to Life
Fridge Storage
Cover the cake loosely with plastic wrap and store it in the refrigerator for up to 4 days. The glaze will stay glossy, and the cheesecake layer will retain its silky texture. If you notice any condensation, pat the surface gently with a paper towel before serving.
Freezer Friendly
Wrap the entire cake in a double layer of freezer‑grade foil, then place it in an airtight container. It freezes beautifully for up to 2 months. When you’re ready to enjoy, thaw it in the fridge overnight, then let it sit at room temperature for 30 minutes before serving.
Best Reheating Method
To revive a slice, preheat your oven to 300°F (150°C), place the slice on a parchment‑lined tray, and add a tiny splash of milk (about a teaspoon) to the top. Heat for 8‑10 minutes; the milk creates steam that restores the cake’s moisture while the glaze re‑melts into a silky finish.